
How I Run My Entire Digital Life on a Raspberry Pi: The Ultimate Self-Hosting Series
Table of Contents
Welcome to my in-depth series, where I unveil how I manage my entire digital life using just a Raspberry Pi! If you’ve ever wanted to take charge of your data, enhance your privacy, and break free from public cloud services, you’re in the perfect place. Throughout this series, I’ll guide you step-by-step in turning a modest Raspberry Pi into the central hub of your personal digital ecosystem. Plus, by running everything on a device that consumes less than 15W, you’ll not only gain control and privacy, but also make an environmentally conscious choice — dramatically reducing your digital footprint while enjoying a greener, more sustainable tech setup.
 Image generated via ChatGPT image generator
What Does It Mean to Run Your Life on a Raspberry Pi?
Simply put, I’ve moved all the essential services I rely on daily off the cloud and onto my own hardware-right at home. No more trusting big tech with my sensitive data. No more worrying about third-party outages or privacy breaches. Everything runs securely on-premises, and only I have access to my information. If something does go wrong, it’s within my control to fix-no more waiting on someone else’s support ticket.
Episodes of my series
Here’s a sneak peek at the powerful, privacy-focused and hopefully non-exclusive set of services we’ll be setting up together:
-
Part 1: Preparing the Ultimate Raspberry Pi Home Server: Kickstart your Raspberry Pi project with a secure, high-performance hardware setup — complete with SSD HAT, advanced cooling, and full drive encryption. Enjoy seamless automount and autodecrypt using a USB key for ultimate convenience and privacy! You are reading this part now, scroll down to start.
-
Part 2 — Docker and Portainer: Effortlessly manage all your Docker containers with a sleek web interface.
-
Part 3—Pi-hole with DNSCrypt-Proxy: Block ads and malware at the network level, monitor DNS traffic, and encrypt your DNS queries for ultimate privacy. Pi-hole even offers a handy dashboard, and with DNSCrypt-Proxy, your DNS requests are securely distributed across multiple encrypted channels.
-
Part 4— Remote access: Based on your preferences and ISP settings, either nginx+Let’s encrypt (if you have a public IP address) or cloudflared (with Zero Trust access) that only helps if you are behind a NAT but also hides your actual IP address from everyone. If you have public IP and want to take full control of your remote access, go to Part 16.
-
Part 5— Vaultwarden: Host your own Bitwarden-compatible password manager, keeping your credentials safe, secure, on your own ecrypted device, and under your control.
-
Part 6— Nextcloud: Create your own private cloud for seamless backups and file sharing-no more relying on Google Drive or Dropbox.
-
Part 7— Transmission with VPN: Download open-source or legally distributed torrents securely and anonymously, bypassing censorship with a built-in VPN.
-
Part 8— Home Assistant: Integrate and automate your smart home devices, all managed locally for privacy and reliability.
-
Part 9— Gotify: Set up a lightweight notification server to receive real-time alerts from any app or webhook-directly on your phone.
-
Part 10— Grafana, Prometheus, Node Exporter, Smartctl, and more: Monitor your Raspberry Pi’s health and performance, ensuring your home server runs smoothly 24/7.
-
Part 11—Watchtower: Automatically keep all your containers up to date with the latest and most secure versions-no manual intervention needed.
-
Part 12—Keycloak: Supercharge your login and user management with Keycloak!
-
Part 13 — Outline: Run your Notion-alternative entire on-prem and take back your online notes to be indeed yours only!
-
Part 14 — Step into the world of Matrix: Tired of the restrictions, frustrations, and lock-ins of centralized messaging platforms like Slack, Mattermost, and Teams? Take back complete control of your conversations by running your own distributed chat server on a Raspberry Pi and experience true privacy and freedom in your digital communications.
-
Part 15—Monitor the monitors: Let’s see how much resources our services and monitoring services consume and whether we do even more.
-
Part 16 — True Remote Access Freedom via Battle-Tested NGINX and No External Gatekeepers: Fortify Your Home Lab: Secure Remote Access on Raspberry Pi with NGINX & mTLS — No Third-Party Cloudflare tunnel, Just Pure Speed and Control!
-
Part 17 — Encrypted DNS on the Road: Bring our Pi-hole we built in Part 3 with us when we leave our home. Protected and unified DNS management everywhere.
-
Part 18 — Self-Hosted Messenger Hub: Ditch the increasingly freemium Rambox for Ferdium, an Apache-2.0 messenger aggregator whose optional sync server we self-host on the Pi behind nginx.
-
Part 19 — Automate Your Wildcard Certificates: Kill the quarterly certbot ritual for good with acme.sh, acme-dns, and one permanent CNAME record — works even on registrars with no DNS API.
Part 1: Preparing the Ultimate Raspberry Pi Home Server
In this first post, we’ll get our hardware ready for action. For this project, I’m using a Raspberry Pi 5, which offers impressive performance and efficiency. Since our Pi will be running 24/7/365, a robust cooling system is essential to keep things stable. We’ll also need reliable storage-an NVMe SSD is my top pick for speed and durability, and it keeps the setup sleek and compact.
Hardware setup
I bought the following cooling for my PI, not only because of its price but also for its performance
For my NVMe HAT, I went with Geekworm’s X1005 model. Geekworm is well-known for producing reliable and reasonably priced accessories for the Raspberry Pi, making them a popular choice among DIY enthusiasts and home server builders. The X1005 is specifically designed for the Raspberry Pi 5, supporting a wide range of NVMe M.2 SSD sizes (2230/2242/2260/2280), and it mounts neatly on the bottom of the Pi for a clean, compact setup
While it may seem that the two parts will interfere with each other, I managed to puzzle them together.
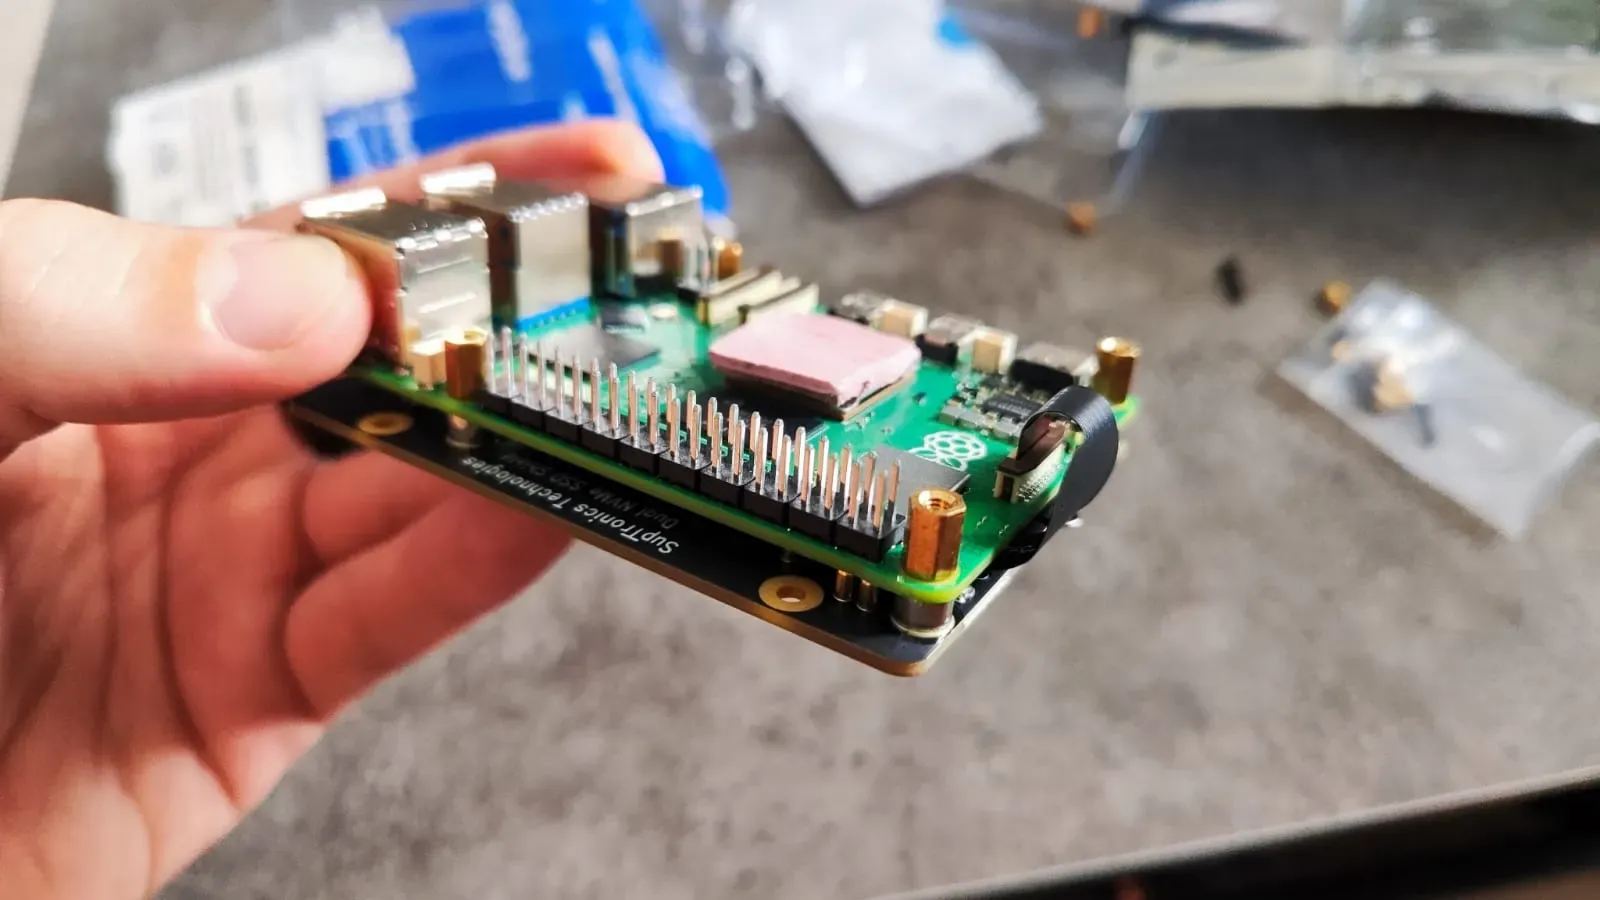 Add the X1005 first to the bottom but mix in the screws from the cooler
Then, you can apply the cooler and fix it easily.
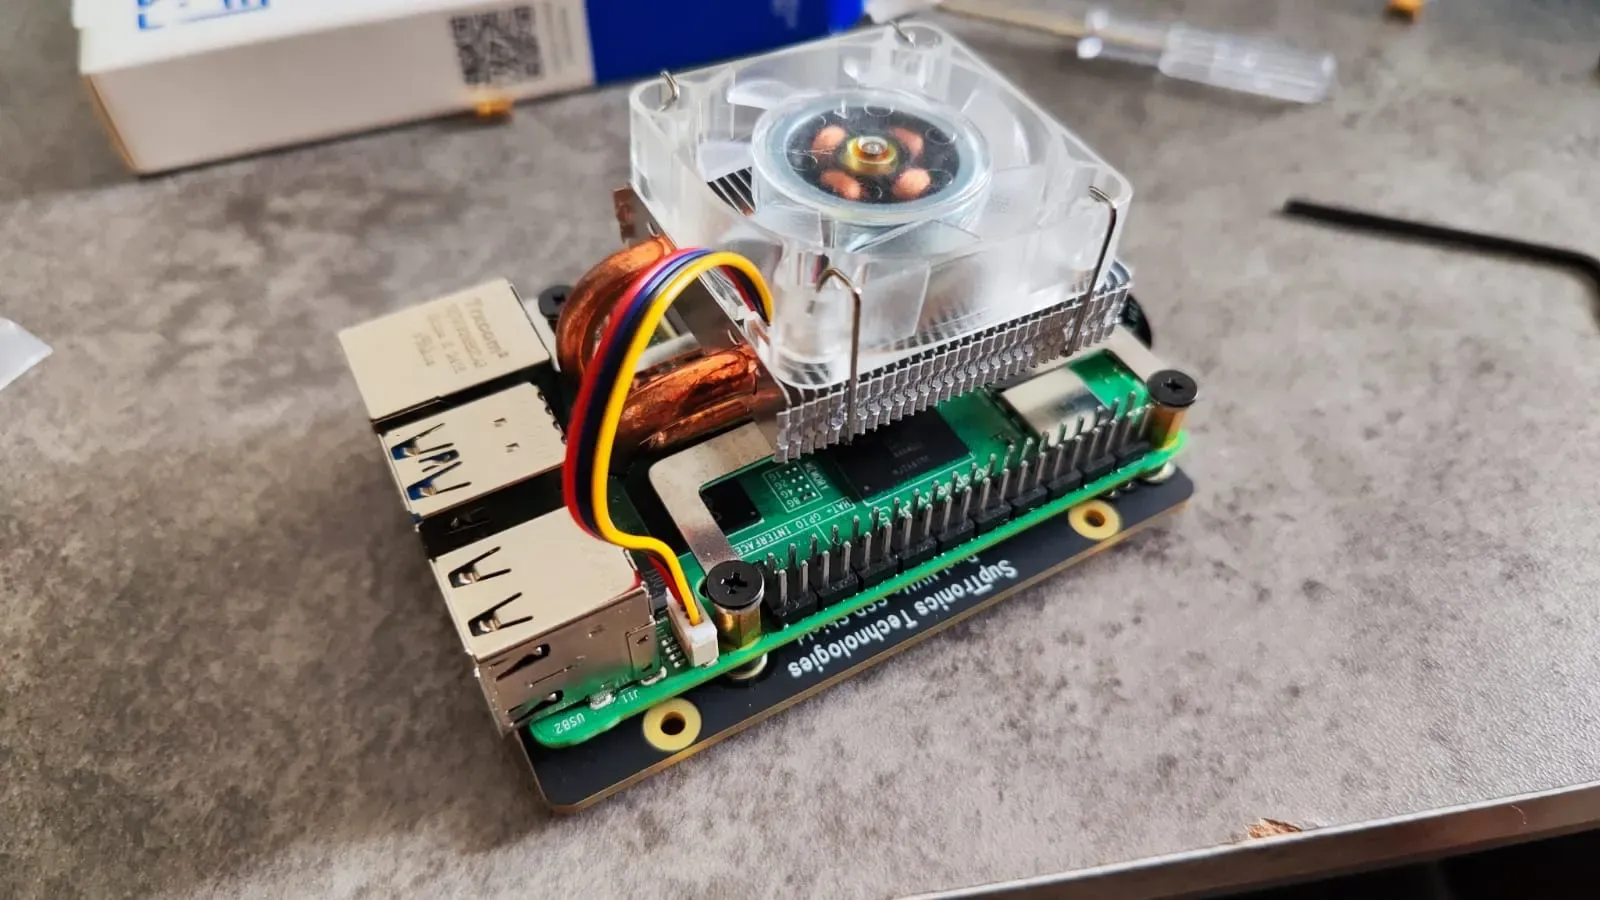 Fixing the cooler
By mounting the NVMe HAT in this way, you won’t block any crucial screw holes, ensuring all further mounting points remain accessible. No pins or other components are covered or obstructed, so installation is exactly as the official manual recommends. This approach keeps your Raspberry Pi setup clean, versatile, and ready for any additional hardware or accessories you might want to add later.
 The final look
Securing Your Data: Encrypting the SSD for Ultimate Privacy
We’ll be encrypting the SSD to ensure that, even if someone physically removes your drive, your sensitive data remains completely protected. Disk encryption is a powerful privacy safeguard, making it nearly impossible for unauthorized users to access your files without the encryption key. While encryption does introduce some performance overhead, modern SSDs and the Raspberry Pi 5’s improved processing power mean the impact is generally modest for most home server tasks-especially if you use efficient encryption methods like LUKS. And this is what we are going to do.
Since your setup, in terms of SSD hat, most likely differs from mine, I am refrain from giving a tutorial on how to setup the hat itself. For a geekworm x1005, you might visit this site….or simplest way is to get to the official website.
Let’s install the basic packages, umount our SSD (if we mounted it before), and format it with LUKS. It will prompt for the passphrase; this will be your decryption password
# apt install cryptsetup
# umount /dev/nvme0n1
# cryptsetup luksFormat /dev/nvme0n1
WARNING!
========
This will overwrite data on /dev/nvme0n1 irrevocably.

Are you sure? (Type 'yes' in capital letters): YES
Enter passphrase for /dev/nvme0n1:
Verify passphrase:
Test the passphrase:

# cryptsetup luksOpen  --test-passphrase /dev/nvme0n1
Enter passphrase for /dev/nvme0n1:
Decrypt the device, create a mapper for it called* crypt_2TB*, and create a filesystem. Finally mount it.
# cryptsetup luksOpen   /dev/nvme0n1 crypt_2TB
# mkfs.ext4 /dev/mapper/crypt_2TB -n storage
mke2fs 1.47.0 (5-Feb-2023)
Creating filesystem with 488374272 4k blocks and 122332032 inodes
Filesystem UUID: bc0be631-59c5-49fb-ac86-0ecd59321f1d
Superblock backups stored on blocks:
 32768, 98304, 163840, 229376, 294912, 819200, 884736, 1605632, 2654208,
 4096000, 7962624, 11239424, 20480000, 23887872, 71663616, 78675968,
 102400000, 214990848

Allocating group tables: done
Writing inode tables: done
Creating journal (262144 blocks): done
Writing superblocks and filesystem accounting information: done

# mount /dev/mapper/crypt_2TB /mnt/
What filesystem to choose?
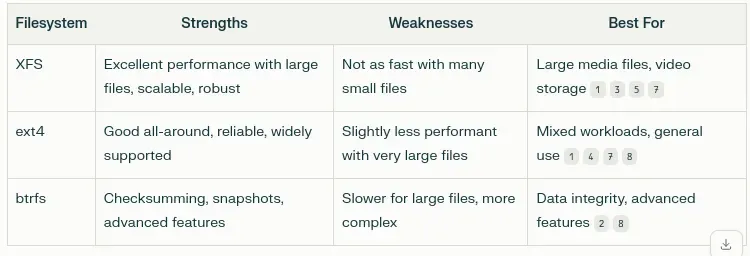 Best filesystem types (according to Perplexity :))
Choosing ext4 and Setting Up Secure, Automated Decryption
I opted for the ext4 file system because it strikes the perfect balance for my needs: it handles both large media files and countless smaller files-like photos, documents, and cloud backups-with speed and reliability.
Once you’ve successfully decrypted and mounted your SSD, the next step is to make this process seamless at every boot. To achieve this, we’ll configure a USB key that securely stores the decryption password. This way, your Raspberry Pi can automatically unlock and mount the encrypted disk during startup-no manual intervention required.
Let’s start by preparing the USB stick for this important role.
Preparing Your USB Key for Automated Decryption
Grab a USB flash drive and insert it into one of your Raspberry Pi’s USB ports. This drive will act as your secure decryption key at every boot. For consistency and reliability, we’ll always mount this USB stick to /mnt/usbkey.
To get started, manually mount your USB drive now:
# mount /dev/sda1 /mnt/usbkeyTo mount it always at every boot time, create an fstab entry; for which we would need the partition ID first. Get it via blkid.
# blkid /dev/sda1
/dev/sda1: LABEL="usbkey" UUID="5ccefa24-5928-4e87-b128-9adaf3462b51" BLOCK_SIZE="4096" TYPE="ext4" PARTUUID="8e9e1b33-01"
As you’ll notice in the blkid output, there are both UUID and PARTUUID identifiers. The PARTUUID is shorter and works just as well for our purpose, so let’s use it for a cleaner and more readable /etc/fstab entry.
PARTUUID=8e9e1b33-01 /mnt/usbkey ext4 defaults,noatime 0 0After adding the PARTUUID line to your /etc/fstab, save the file and exit your text editor.
To test your configuration right away, simply run mount -a.
Create a decrypt key
Now, let’s generate a strong decryption key for your encrypted SSD. We’ll create a random 4096-byte key file, store it securely on your USB stick, and restrict its access so only the root user can read it.
# dd if=/dev/urandom of=/mnt/usbkey/key bs=4096 count=1
# chmod 400 /mnt/usb/key
Now, we add this key to LUKS to be used for our encrypted drive.
# cryptsetup luksAddKey /dev/nvme0n1 /mnt/usbkey/keyWhen you add the new key file to your encrypted SSD, you’ll be prompted to enter your existing decryption password for verification. Go ahead and type it in; this might be the last time you’ll need to do so manually, since from now on, your USB key will handle decryption automatically.
To confirm that both your original passphrase and the new key file are registered with your encrypted volume, check the list of active keys:
# cryptsetup luksDump /dev/nvme0n1 |grep "luks"
  0: luks2
  1: luks2
To get the full picture, remove the grep piping at the end and see everything.
Testing the key
Unmount our storage and close it with LUKS
# umount /mnt/storage/
# cryptsetup -v luksClose crypt_2TB
Command successful.
Let’s try to re-open it.
# cryptsetup -v luksOpen /dev/nvme0n1 crypt_2TB --key-file=/mnt/usbkey/key
No usable token is available.
Key slot 1 unlocked.
Command successful.
As you can see, the key is working, no need to type in the passphrase again.
Setting Up Auto-Decryption at Boot
To enable automatic decryption of your SSD at boot, you’ll need the UUID of your encrypted volume. You can easily retrieve this information using the luksDump command:
# cryptsetup luksDump /dev/nvme0n1 |grep "UUID"
UUID:           9ab9ea30-3f3b-4fca-aeed-f03bf255b0b3
Using the UUID, add an entry to /etc/crypttab.
crypt_2TB UUID=9ab9ea30-3f3b-4fca-aeed-f03bf255b0b3 /mnt/usbkey/key luksPay attention that there are 4 columns, and there is an additional luks keyword at the back.
Testing Your Auto-Decryption Setup
Now it’s time to make sure everything is working as expected. First, let’s verify that your crypttab configuration is correct. To do this, you’ll need to unmount your encrypted volume and close it using LUKS:
# umount storage/
# cryptsetup -v luksClose crypt_2TB
Command successful.
Now, run the following command
# cryptdisks_start crypt_2TB
Starting crypto disk...crypt_2TB (starting)...crypt_2TB (started)...done.
As you can see, the decryption was successful-your encrypted volume unlocked automatically using the USB key, just as intended.
For the final test, go ahead and reboot your Raspberry Pi. Tadaa, it worked. Do the final touches, set your pi user to own it, and create a file for testing purposes.
$ sudo chown pi:pi -R /mnt/storage
$ touch /mnt/storage/test
$ ls /mnt/storage
lost+found  test
Alright, all work fine. We have successfully added a 2TB SSD to our pi, encrypted it, created a decryption key, and put it on a USB stick to automate decryption every time the system is rebooted. Note that the USB stick is convenient, but you need to keep it with you to make encrypting the disk useful. Otherwise, anybody with access to the USB stick is capable of decrypting.
Bonus Round I: Your Swap Is Sitting on the SD Card, and It Knows Too Much
We just went to a lot of trouble. LUKS on the NVMe. A 4096-byte key file on a USB stick. Auto-decryption at boot. Full-disk encryption, so that if somebody walks off with the drive, they get 2TB of expensive noise.
And then the kernel quietly writes your process memory to an unencrypted SD card anyway.
Meet /var/swap — the 512MB swapfile Raspberry Pi OS creates for you by default, on the root filesystem, which lives on mmcblk0. Not on our beautiful encrypted NVMe. On the little plastic card in the slot.
Two problems, and I honestly don’t know which annoys me more.
It’s a privacy hole
Swap is a dump of whatever the kernel evicted from RAM: a fragment of a TLS session key, a Keycloak token, a decrypted blob your self-hosted password manager was holding a second ago. We encrypted the disk precisely so this can’t be read off stolen hardware — then left a plaintext side-channel on removable media that pops out with a fingernail.
It’s murdering your SD card
Flash has finite write cycles. A 24/7 server with a database-backed Home Assistant, MariaDB and a dozen containers already hammers that card. Swap on top is how you get the classic Pi failure mode: not a clean death, but slow, silent, un-debuggable corruption six months out.
Same fix for both: move the swapfile onto the encrypted SSD. Encryption for free, and the writes land on hardware built to take them.
 Encrypting the front door is great. Shame about the letterbox. — image generated via Nano Banana
Do it
One sanity check first — this assumes a stock Pi, where swap is a file managed by dphys-swapfile:
# swapon --showIf TYPE says partition, or grep -i swap /etc/fstab returns a line, something else is in charge and you edit that instead. Otherwise, carry on.
Now move it. Note the #\? in the sed patterns — the defaults in /etc/dphys-swapfile ship commented out, so a naive ^CONF_... pattern matches nothing, reports success, and changes absolutely nothing. Ask me how I know.
# dphys-swapfile swapoff
# sed -i 's|^#\?CONF_SWAPFILE=.*|CONF_SWAPFILE=/mnt/storage/swap/swapfile|' /etc/dphys-swapfile
# sed -i 's|^#\?CONF_SWAPSIZE=.*|CONF_SWAPSIZE=2048|' /etc/dphys-swapfile
Before going further, look at the file and confirm the edits actually landed — sed exits 0 whether it replaced something or nothing at all, so silence is not success here:
# grep -E '^#?CONF_(SWAPFILE|SWAPSIZE|MAXSWAP)=' /etc/dphys-swapfile
CONF_SWAPFILE=/mnt/storage/swap/swapfile
CONF_SWAPSIZE=2048
#CONF_MAXSWAP=2048
Both lines must appear without a leading #. If either still has one, the substitution missed and you’re about to rebuild the swapfile in exactly the same place it already was.
Now create it:
# mkdir -p /mnt/storage/swap
# dphys-swapfile setup
# dphys-swapfile swapon
# rm -f /var/swap
dphys-swapfile setup echoes the path and size it’s using — read that line rather than trusting it. If it mentions /var/swap, stop and go back to the grep.
CONF_MAXSWAP defaults to 2048 and silently truncates anything larger. Want more than 2GB? Uncomment and raise it. On an 8GB Pi, 2GB is insurance, not a memory expansion pack.
Two more files. The first one is not optional in our setup: dphys-swapfile.service has no idea /mnt/storage is a LUKS volume needing a USB key, cryptdisks and a mount before it exists. Win that race and your Pi boots with zero swap and no error you’d ever notice.
# systemctl edit dphys-swapfile[Unit]
RequiresMountsFor=/mnt/storageAnd a tuning knob — with several gigs genuinely free, you don’t want the kernel evicting pages for fun. Create /etc/sysctl.d/99-swap.conf:
vm.swappiness=10Reboot and verify
$ swapon --show
NAME                       TYPE SIZE USED PRIO
/mnt/storage/swap/swapfile file   2G   0B   -2
$ cat /proc/sys/vm/swappiness
10
The SSD path, 2G, and swappiness at 10. If swapon --show comes back empty, the mount-order race won and the RequiresMountsFor override needs another look. Far better to discover that now, deliberately, than at 3am when the OOM killer picks your database as the sacrifice.
Two honest caveats before we move on. No USB key, no swap — without the stick the SSD never unlocks, /mnt/storage never mounts, and the Pi comes up swapless. It still boots; it just runs without a net. That’s a trade I’ll take, but it is a trade. And this protects swap at rest only. Against someone who already has root on a running box, where the disk is mounted and decrypted by definition, it does nothing. Encryption was always for the stolen-drive scenario.
For the
zramcrowd: yes, compressed swap in RAM is the other good answer, and on a Pi 5 with idle CPU to spare it’s arguably better — zero disk writes at all. I went with the encrypted SSD because I wanted real capacity as a safety net, not just compression. Flip that decision without guilt if it suits your box better.
Bonus Round II: Swap Was Never the Only Thing Bleeding Your SD Card
If you did the swap relocation above, good — plaintext swap on an unencrypted SD card was the single biggest hole in an otherwise LUKS-locked box, and it’s closed now. But treating swap as “the SD card wear problem, solved” is like patching one leak on a boat with four. The SD card is still taking a beating from three other directions, every single day, and two of them are things you’re running right now without thinking about it.
Your Home Directory Doesn’t Belong There Either
Every tool that follows the XDG Base Directory spec — which is most of Linux userland, from pip to fontconfig to your browser — dumps its disposable junk into ~/.cache. None of it is precious. All of it is written constantly. And by default, all of it lives on the same card that’s already hosting your root filesystem.
Bind-mount it off, no symlinks required:
$ sudo mkdir -p /mnt/storage/pi-home-cache
$ mkdir -p /home/pi/.cache
$ sudo chown -R pi:pi /mnt/storage/pi-home-cache/etc/fstab:
/mnt/storage/pi-home-cache /home/pi/.cache none bind,nofail,x-systemd.requires-mounts-for=/mnt/storage 0 0That x-systemd.requires-mounts-for clause is the one people skip, then wonder why .cache is empty after a reboot — without it, systemd is free to bind-mount before /mnt/storage itself is actually online, and you get an empty bind pointed at nothing.
Logs Are the Silent Killer — But Don’t Get Greedy
On an idle 24/7 box, journald is frequently the single heaviest continuous writer on the whole system — heavier than swap ever was for most of you. Check it:
$ journalctl --disk-usageThe instinct here is to bind-mount the entire /var tree and be done with it. Don’t. /var is required early in boot — before your user session exists, before dpkg and most services start — and bind-mounting the whole thing races your SSD’s device enumeration against local-fs.target. Lose that race on a headless box and you’re not looking at “wrong cache path,” you’re looking at a Pi that might not reach multi-user boot. /var/run and /var/lock are already tmpfs symlinks on Raspberry Pi OS anyway, so binding the whole tree buys you nothing there.
Bind /var/log specifically instead — it’s the dominant write source, and it tolerates being mounted slightly later than dpkg state needs:
$ sudo mkdir -p /mnt/storage/pi-var-log
$ sudo rsync -aXS /var/log/ /mnt/storage/pi-var-log//etc/fstab:
/mnt/storage/pi-var-log /var/log none bind,nofail,x-systemd.requires-mounts-for=/mnt/storage 0 0rsync first, not straight to an empty bind — /var/log already has real content in it, and binding an empty directory over it doesn’t delete those logs, it just hides them until you unmount. See systemd.mount’s ordering rules if you want the full story on why boot-critical paths and bind mounts don’t always play nice.
Even APT Is Guilty
If you’re running apt update every couple of days — and on a box you actually patch, you probably are — /var/lib/apt/lists gets fully rewritten every cycle, not appended to. That’s real, sustained SD wear at scale, not a rounding error:
$ sudo mkdir -p /mnt/storage/pi-apt-cache /mnt/storage/pi-apt-lists
$ sudo rsync -aXS /var/cache/apt/ /mnt/storage/pi-apt-cache/
$ sudo rsync -aXS /var/lib/apt/ /mnt/storage/pi-apt-lists//etc/fstab:
/mnt/storage/pi-apt-cache  /var/cache/apt  none  bind,nofail,x-systemd.requires-mounts-for=/mnt/storage  0  0
/mnt/storage/pi-apt-lists  /var/lib/apt    none  bind,nofail,x-systemd.requires-mounts-for=/mnt/storage  0  0
Leave /var/lib/dpkg alone — that’s the actual installed-package state database, not a cache, and it’s small enough that relocating it is pure risk for zero upside.
If you’re patching daily or every-other-day and want the security coverage without the write churn of a full apt upgrade, unattended-upgrades scoped to the security origin only via Origins-Pattern gets you CVE patches without feature-version churn on a box you’d rather not have surprise-reboot itself.
The Privacy Angle You Didn’t Expect
Here’s the part that actually earns this a spot in this series and not just a generic “reduce SD wear” listicle: if /mnt/storage is the same LUKS-encrypted volume from the hardware section above, every one of these bind mounts doesn’t just relocate writes — it encrypts them at rest. Browser cache, IndexedDB, system logs with IPs and hostnames in them, even the apt package lists that reveal exactly what you’re running — all of it was sitting in plaintext on a card you could pull out with a fingernail. Now it isn’t. (If /mnt/storage is a separate, unencrypted drive, you still get the wear-leveling win — just not this one. Worth knowing which situation you’re actually in before you write that sentence into your own post.)
Verify the whole set after reboot:
$ findmnt /home/pi/.cache /var/log /var/cache/apt /var/lib/apt
$ systemd-analyze critical-chain local-fs.target
$ journalctl --disk-usage
That last command should now report a number that’s actually meaningful to check periodically against your SSD’s health — not your SD card’s.
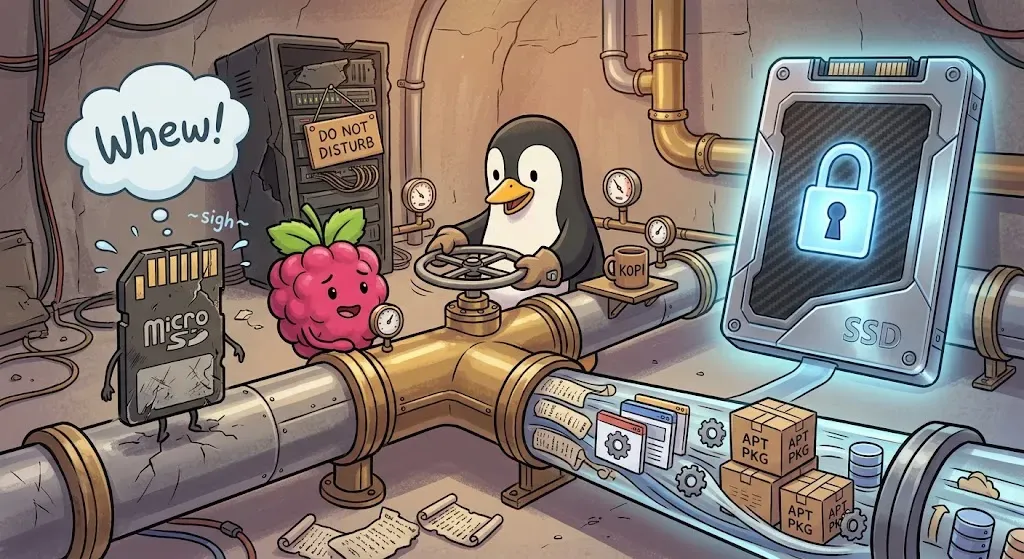 Redirecting traffic, one bind mount at a time. — image generated via Nano Banana