
Part 8 — How I Run My Entire Digital Life on a Raspberry Pi: Make it to Become the Brain of our Smart Home
Table of Contents
In this episode, we’re taking smart home control to the next level by running Home Assistant in a container on our Raspberry Pi — giving you powerful automation without relying on the public cloud. You’ll learn how to set up Home Assistant so your devices communicate locally and your data stays private, with cloud connections only as a last resort. Get ready to unlock seamless, private smart home management and experience the freedom of a truly self-hosted setup!
 Image generated by ChatGPT
In this episode, we’ll be setting up a new Docker stack to run Home Assistant. While I currently manage all my smart home devices through Home Assistant, it’s time to migrate everything to my Raspberry Pi. This episode won’t cover how to configure individual devices or create automations, as those are separate topics and can vary greatly depending on the device. For example, I’ve already published several articles detailing the setup of specific Zigbee devices that were previously lacking good documentation.
Home Assistant stack
Let’s jump into Portainer and set up a new stack named homeassistant. While Home Assistant will likely auto-discover most devices, if you want to use Zigbee, you’ll need a compatible USB stick. I personally use the Sonoff Zigbee 3.0 USB—it’s fully compatible right out of the box and incredibly affordable. Zigbee is great for keeping your smart home secure, as its device communications stay local, much like Bluetooth, unless you’re using a cloud-based app or a manufacturer’s online Zigbee hub, which often pushes remote access. That’s exactly what we’re avoiding here. We won’t rely on any third-party Zigbee hubs or apps; instead, Home Assistant will manage all your devices locally, and we’ll only expose Home Assistant itself for secure remote access.
If you have a public IP and can run an Nginx reverse proxy, Home Assistant supports mutual TLS authentication. This lets you create your own certificate authority and client certificates, which you can install on your phone or laptop for secure authentication. With this setup, not only do you have password and OTP protection, but even if someone gets your credentials, they’d still need a valid client certificate to gain access. This approach makes your smart home as secure as it gets.
Find the docker-compose below:
services:
  homeassistant:
    container_name: homeassistant
    restart: unless-stopped
    image: homeassistant/home-assistant:latest
    hostname: homeassistant
    volumes:
      - "/etc/localtime:/etc/localtime:ro"
      - "/mnt/storage/docker/homeassistant/config:/config:rw"
    devices:
      # your Zigbee usb device to attach to the container
      - /dev/ttyUSB0:/dev/ttyUSB0
    dns: 172.30.1.3
    ports:
      - "8123:8123"
     network_mode: host
As you can see, while Home Assistant configurations might seem intimidating at first, they’re actually quite straightforward once you get started. In the end, the main thing you need to specify is the location of your Zigbee USB device — typically /dev/ttyUSB0 if you have only one. This is the only scenario in our series where full host network access is required; notice that no specific IP is set, ports are manually exposed, and network_mode is set to host. These settings are essential for Home Assistant to function correctly from a container. As usual, we’ll set up a persistent storage volume. In my case, I simply copied over my existing Home Assistant data since I’m migrating. For a fresh installation, you should still create this persistent storage directory, but you’ll need to configure your environment from scratch.
Let’s deploy our stack
After clicking deploy, it takes the most amount of time so far to obtain such a big image as Home Assistant. But after all, the logs show that everything is fine, and I realized straight away that my motion sensor just started to work and triggered a smart bulb to switch on.
 The logs says all are good
After hitting deploy, downloading the Home Assistant image took the longest time of any setup so far due to its size. But once it finished, the logs confirmed everything was running smoothly — and I immediately noticed my motion sensor had come online, triggering a smart bulb to turn on right away.
Remote access with cloudflared
Although Home Assistant is now easily accessible from your laptop since it’s exposed on the Pi, let’s take it a step further by enabling remote access through our Cloudflare tunnel. Head back to your tunnel settings and add a new public hostname to set this up.
 Setting up a new public host for our Home Assistant
Since Home Assistant has the network mode set to host, it means it runs on the host (from a networking perspective), instead of inside a container. Therefore, the IP we need to set our cloudflared tunnel to tunnel the traffic is the docker bridge IP 172.30.1.1 and the exposed Home Assistant port 8123. The rest of the configuration is just as simple as before it was in our previous episodes; just set the subdomain for your main domain, select the correct service type to HTTP and click on save. After that, you can connect to your home assistant remotely.
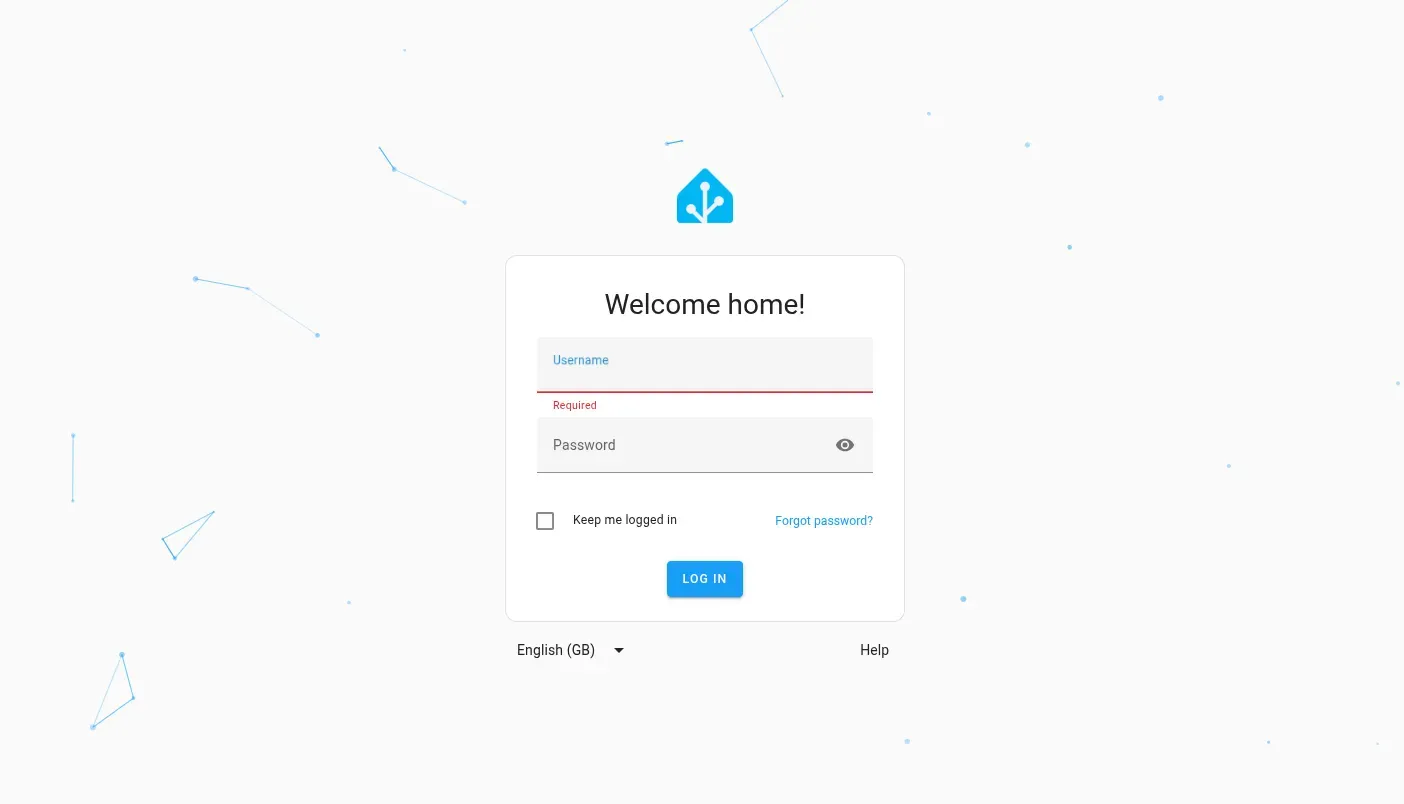 We can access our Home Assistant remotely
Remote Access with NGINX
If you are heaving NGINX configured just as suggested in Part 16, here is the configuration for Home Assistant with specifically implemented rate limiting for certain API endpoints. As you can see, since Home Assistant is running on network_mode: host, the backend IP is the docker bridge’s IP.
###############################
###     HOME ASSISTANT      ###
###############################
server {
    listen 80;
    server_name ha.cslev.vip;
    return 301 https://$host$request_uri;
}

server {
  set $homeassistant http://172.30.1.1:8123;

  listen 443 ssl;
  http2 on;
  server_name ha.cslev.vip;
  include /etc/nginx/ssl.conf;

  # Static frontend assets — no rate limit
  location /frontend_latest/ {
    proxy_pass $homeassistant;
    include /etc/nginx/proxy.conf;
    proxy_cache_valid 200 1d;
    access_log off;
  }

  location /static/ {
    proxy_pass $homeassistant;
    include /etc/nginx/proxy.conf;
    proxy_cache_valid 200 1d;
    access_log off;
  }

  location /local/ {
    proxy_pass $homeassistant;
    include /etc/nginx/proxy.conf;
    access_log off;
  }

  # WebSocket — no rate limit, long timeout
  location /api/websocket {
    proxy_pass $homeassistant;
    include /etc/nginx/proxy.conf;
    proxy_read_timeout 3600s;
    proxy_send_timeout 3600s;
    access_log off;
  }

  # REST API — light rate limit
  location /api/ {
    limit_req zone=mylimit burst=20 nodelay;
    proxy_pass $homeassistant;
    include /etc/nginx/proxy.conf;
    access_log /var/log/nginx/access_homeassistant.log;
    error_log  /var/log/nginx/error_homeassistant.log;
  }

  # Auth — strict rate limit
  location /auth/ {
    limit_req zone=mylimit burst=5 nodelay;
    proxy_pass $homeassistant;
    include /etc/nginx/proxy.conf;
    access_log /var/log/nginx/access_homeassistant.log;
    error_log  /var/log/nginx/error_homeassistant.log;
  }

  # Everything else
  location / {
    limit_req zone=mylimit burst=20 nodelay;
    proxy_pass $homeassistant;
    include /etc/nginx/proxy.conf;
    access_log /var/log/nginx/access_homeassistant.log;
    error_log  /var/log/nginx/error_homeassistant.log;
  }

  location = /robots.txt {
    alias /usr/share/nginx/html/robots.txt;
    allow all;
    log_not_found off;
    access_log off;
  }
}
Dashboard
Once you’ve created your admin user and logged in, you might want to set up a basic user — like pi — that can access the Home Assistant dashboard locally without needing to authenticate. This is especially useful if you have a screen connected to your Pi and want the dashboard to launch automatically after every reboot. For example, I built a custom case for my Pi, attached an affordable 2K display, and added a budget-friendly USB touchscreen. With a bit of DIY effort, I turned it all into a personalized “smart frame.”
 my smart frame
I added a USB hub and a 12V->5V converter, so then I can have a beefier 12V charger with a lot of amps :). As you can see, I also add the Sonoff Zigbee dongle inside the frame.
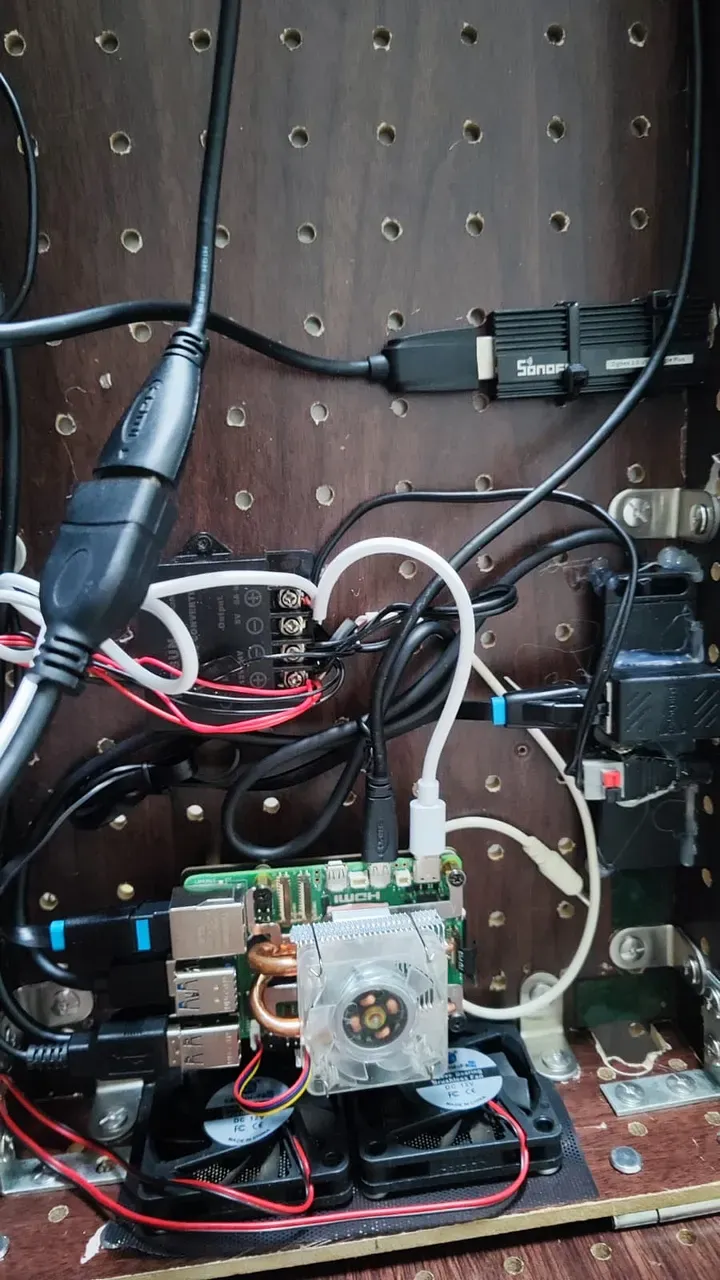 The pi is installed inside with additional fans and extra accessories
Once I installed it, I hanged it on the wall.
 My smart frame hanged on the wall
Now, as you can see, my pi boots into the desktop environment automatically, but I want to see the Home Assistant dashboard instead.
User with trusted network
To do so, create a new guest user in home assistant, and let’s name it pi . Then, navigate to https://ha.[YOUR_DOMAIN]/config/users. Select your pi user, and you will see its ID.
 Get the user ID of user
 pi
Once, we have the ID, go back to CLI; ssh into your pi, and go to /mnt/storage/docker/homeassistant, and open config/configuration.yaml for edit. Then add the following lines at the end and replace YOUR_HASHED_USER_ID to the one you got from the dashboard.
## to allow autologin on pi's browser
homeassistant:
  auth_providers:
    - type: trusted_networks
      trusted_networks:
        - 192.168.22.2/32
        - 172.30.1.251/32 #for NGINX's container if you have
        - 127.0.0.0/8
      trusted_users:
        #allow even if using localhost or actual local IP
        127.0.0.1: YOUR_HASHED_USER_ID
        192.168.22.2:  YOUR_HASHED_USER_ID
      allow_bypass_login: true
    - type: homeassistant
Disable Wayland
Alright, let us also make sure, no Wayland is running. We want Xorg as the default X. This will help us later. On your Pi, you can issue
$ echo $XDG_SESSION_TYPE
wayland
If it says wayland, then run sudo raspi-config and change it to Xorg. It might “somehow” changes your desktop environment to openbox, as you can see in raspi-config, but don’t bother much. Just restart your pi and once rebooted, remote SSH and delete openbox.
# apt remove openboxRemove all lxde related packages too, I just found it difficult to set it up under Xorg. Remove anything that is gnome too.
# apt remove lxde-*
# apt remove gnome-*
# apt-get autoremove --purge
Install Xfce4 instead
# apt install xfce4Setup lightdm to autologin into Xfce session by editing /etc/lightdm/lightdm.conf and set the following parameters under section [Seat:*]:
autologin-user=pi
autologin-user-timeout=0
autologin-session=xfce
After saving it, reboot to confirm Xfce is booted and autologin works.
Kiosk mode with an autostarted Chromium
Before we set the browser to autostart, we need to address the “SD card killer”: Browser Caching. We already bind-mounted many directories, including .cache to our SSD in Part I.
But chromium profiles are a different story as it lands in ~/.config/chromium, and handling chromium differently is key for SD card wear avoidance.
Autostart Chromium first
For Xfce, we need to create a .desktop file in ~/.config/autostart directory.
$ mkdir ~/.config/autostart
$ nano ~/.config/autostart/autostart.desktop
Add the following lines to that .desktop file:
[Desktop Entry]
RequiresMountsFor=/mnt/storage
Type=Application
Name=My autostart script
Exec=/home/pi/autostart.sh
X-GNOME-Autostart-enabled=true
Note the RequiresMountsFor=/mnt/storage, this makes it sure the SSD is already mounted and ready.
Create that script under /home/pi/autostart.sh and add these optimized lines to it:
#!/bin/bash
# Give the network and desktop environment 10 seconds to fully initialize
sleep 10s

/usr/bin/chromium \
  --kiosk \
  --user-data-dir=/mnt/storage/chromium-profile \
  --disk-cache-dir=/mnt/storage/chromium-cache \
  --disk-cache-size=104857600 \
  --memory-model=low \
  --no-first-run \
  --noerrdialogs \
  --disable-restore-session-state \
  --disable-infobars \
  --disable-sync \
  --disable-translate \
  --disable-features=Translate,GlobalMediaControls,IsolatedCodeCache \
  --check-for-update-interval=31536000 \
  http://192.168.22.2:8123
We’ve added specific “Pro” flags to ensure Chromium doesn’t exceed the 300MB RAM limit we set above and to disable the CPU-heavy “Code Cache.”
Why these specific flags?
--user-data-dir=/mnt/storage/chromium-profile: is the one that matters — it moves the entire profile (Service Worker cache, IndexedDB, GPU shader cache, session state) off the card in one shot, not just the HTTP cache.--disk-cache-dir=/mnt/storage/chromium-cache: becomes cosmetic once you set that, but there’s no harm keeping it explicit.--disk-cache-size=104857600: Limits the internal cache to 100MB. This ensures it never fills up the 300MB RAM disk we created in/etc/fstab.--disable-features=...,IsolatedCodeCache: Stops Chromium from pre-compiling JavaScript into tiny files. This reduces CPU spikes and keeps the RAM disk lean.--memory-model=low: Tells Chromium it’s running on a resource-constrained device so it releases RAM more aggressively.--check-for-update-interval: Since this is a kiosk, we don’t want the browser wasting resources checking for updates in the background.
Save it and add correct execute permission properly:
$ chmod +x ~/autostart.shLet’s reboot and see if it works.
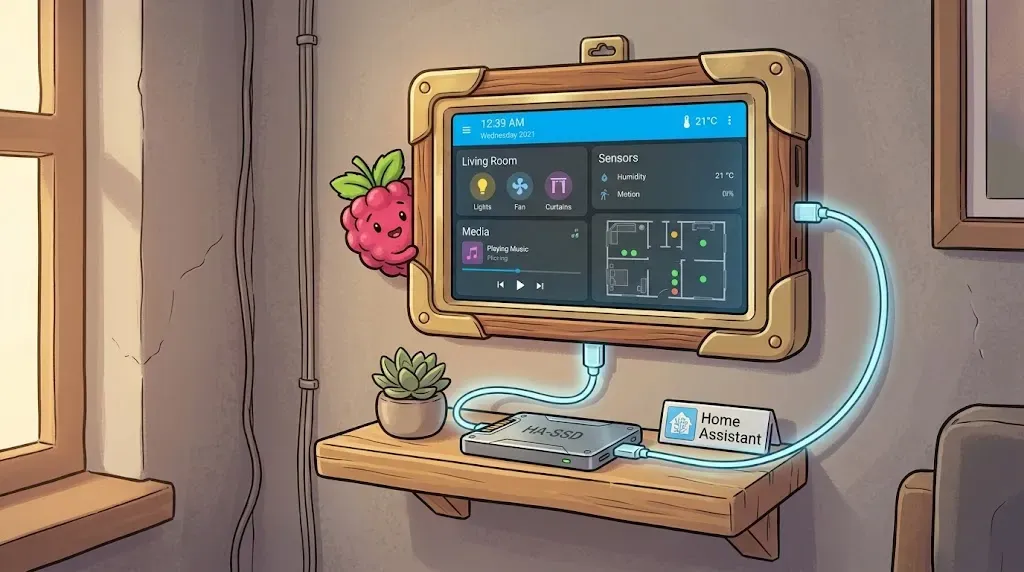 Your kiosk deserves better real estate than a microSD card. — image generated via Nano Banana
Booted up and landed at Home assistant.
![After reboot, my pi auto-logged in, and navigated to Home Assistant [i purposely clicked on the user settings to take the picture]](/_astro/img-08.C382hhsv_ZUJY7w.webp) After reboot, my pi auto-logged in, and navigated to Home Assistant [i purposely clicked on the user settings to take the picture]
After reboot, my pi auto-logged in, and navigated to Home Assistant [i purposely clicked on the user settings to take the picture]
Smart display
Let’s give the display some intelligence by having it turn on only when I’m present. I already have a motion sensor installed in the same area, which is set up to activate the entrance light — right where the “smart frame” is located. Now, let’s create a script that uses this same sensor to automatically turn the screen OFF and ON based on my presence.
First, make sure you can switch OFF and ON the screen with the following command:
$ xset -display :0.0 dpms force off
$ xset -display :0.0 dpms force on
Issuing these two command in sequence would switch OFF and ON the display. Unfortunately, since I have a HDMI display, there is no other control from the Pi that would allow me to disable the backlight. So it remains lit, but at least the screen is off. Okay, let’s make a script; we are going to rely on a named pipe. It will be a simple file which is written by home assistant every time an event of motion is triggered. It will write to the file SWITCH_OFF or SWITCH_ON. The script on the host, will continuously monitor this file, and issue the proper xset command to switch off and on the display accordingly.
$ mkdir /mnt/storage/docker/homeassistant/control_host
$ nano /mnt/storage/docker/homeassistant/control_host/read_named_pipe.sh
Add the following content to the script:
#!/bin/bash

DST_FOLDER=$1

SCREEN_ON_PIPECMD="SWITCH ON"
SCREEN_OFF_PIPECMD="SWITCH OFF"

SCREEN_ON_COMMAND="xset -display :0.0 dpms force on"
SCREEN_OFF_COMMAND="xset -display :0.0 dpms force off"

while true
do
  date=$(date)
  cmd=$(cat $DST_FOLDER/named_pipe) #get the latest command
  if [[ "$cmd" == "$SCREEN_ON_PIPECMD" ]]
  then
    echo "Switching screen on ${date}" >> $DST_FOLDER/named_pipe.log
    $SCREEN_ON_COMMAND

    #eval $(cmd)
  elif [[ "$cmd" == "$SCREEN_OFF_PIPECMD" ]]
  then
    echo "Switching screen off ${date}" >> $DST_FOLDER/named_pipe.log
    $SCREEN_OFF_COMMAND
  else #logging wrong commands
    echo "Unaccepted command received ${date} |-->  ${cmd}" >> $DST_FOLDER/named_pipe.error
  fi
done
As you can see, the only parameter of the script is the folder where the named_pipe is. In our case, this is /mnt/storage/docker/homeassistant/control_host/, so by using this path, add it to the crontab of the user pi. Issue the following command on the pi as pi:
$ crontab -eThen, add the following line at the end:
@reboot bash /mnt/storage/docker/homeassistant/control_host/read_named_pipe.sh /docker/homeassistant/control_hostSave the file, and quit from the editor
This will launch the script every time the system is rebooted.
Let’s add the named pipe to our homeassitant container too, and edit the docker-compose in portainer by adding this extra volumes section.
- "/mnt/storage/docker/homeassistant/control_host/named_pipe:/named_pipe:rw"Last but not least, add new “scripts” to Home Assistant. Open the configuration file:
$ nano /mnt/storage/docker/homeassistant/config/configuration.yamlThen, append the following to the end:
shell_command:
  switch_on_screen: echo "SWITCH ON" > /named_pipe
  switch_off_screen: echo "SWITCH OFF" > /named_pipe
This creates two “shell scripts” in Home Assistant that can be called as actions (after restarting Home Assistant), which, as you can see, simply writes “SWITCH ON” or “SWITCH OFF” to the named_pipe we also added to the container as volume. Let’s restart the whole pi to finalize our setup.
Now, you can define an automation like this:
 Create automation accordingly
Once the motion sensor becomes “not occupied”, we call the switch_off_screen shell script. A similar is applicable for turning on the screen.
Alright, I’ll leave you to set up the rest of your smart home devices. I just wanted to suggest that, if you’re interested in a DIY project, it could be really handy to integrate this feature into Home Assistant and transform it into a smart frame.
What a journey we’ve had in this episode! We transformed a humble Raspberry Pi into the brains of a truly smart frame — combining Home Assistant’s power with clever automation, a custom display, and even motion-sensing magic. Along the way, we tackled challenges like seamless autologin, automatic dashboard launching, and fine-tuned display control, all while learning how to make our setup more responsive and energy-efficient.
But this is just the beginning. With these foundations in place, your smart frame is ready to become the centerpiece of your connected home — displaying useful info, responding to your presence, and integrating with all your other smart devices. Whether you’re a DIY enthusiast or just starting out, you now have the tools and know-how to keep building and customizing your smart home experience.
Stay tuned for more creative projects and smart home adventures. The future is bright — and now, your display only turns on when you are!