Latest OpenWrt on the Banana Pi BPI-R4 eMMC - The Clean Way, Without Bricking Anything
Table of Contents
How I put a current, official OpenWrt onto the internal eMMC of a Banana Pi BPI-R4 and why the memory chip you’re staring at decides everything before you download a single image.
Everyone buying a BPI-R4 has heard the pitch by now: MediaTek Filogic 880, quad Cortex-A73, 10G SFP+ cages, Wi-Fi 7, a proper open-source router board you actually own. What almost nobody tells you is that the path from unboxed board to current OpenWrt booting off internal storage is a small maze of jumpers, boot sources, and vendor images old enough to have their own nostalgia playlist.
I walked the whole maze so you don’t have to. This is the success path - the exact sequence that worked - stripped of the dead ends.
 One board, one clean install, zero bricks - planting the flag on the eMMC. - image generated via Nano Banana
The RAM trap in the official guide - and how to skip it entirely
ollow the official Banana Pi docs and you’ll quickly hit a fork that can genuinely brick your board: image selection by RAM size. The BPI-R4 ships in 4GB and 8GB variants, the DRAM training lives in the bootloader (the bl2 preloader), and the 8GB variant uses different memory chips needing a different low-level config. There’s no clean auto-detection. Pick the wrong bootloader for your RAM on the vendor path and you get a board capped at half its memory — or one that won’t train DRAM at all and simply refuses to boot. And the silkscreen won’t save you: mine read R4MAIN with a revision number, which identifies the board, not the memory fitted to it. Two identical-looking boards can be 4GB and 8GB.
So the vendor route hands you a scary, one-mistake-and-it’s-dead decision before you’ve even started.
Here’s the reframe that makes the whole problem vanish: don’t take the vendor route. Use the standard mainline OpenWrt image for this arch. The BPI-R4 is a mainline OpenWrt target (mediatek/filogic), and the standard image plus the board’s own recovery bootmenu handle the DRAM correctly regardless of whether you’re on 4GB or 8GB — there’s no variant-specific bootloader for you to pick wrong, so there’s nothing to brick. On top of that, it’s a current, maintained build (kernel 6.x, ongoing security updates) versus the vendor’s frozen 2023 / kernel-5.4 images. You dodge the scariest step and end up on better software. That’s the whole trick of this post.
(If you’re curious what you have: the two DDR4 chips next to the SoC carry the answer — mine read Samsung K4AAG165WA-BCWE, where the AG density field means 16 Gbit per chip, so two of them = 4GB; an 8GB board reads K4ABG16…, BG = 32 Gbit. Worth knowing, but with the standard-image route below you don’t need it — which is exactly the point.)
Boot the factory NAND first — then ignore it
The board arrives with a factory image on its SPI-NAND. Flip SW3 to NAND, power on with a serial console attached (3.3V TTL, 115200 8N1 — respect the 3.3V, the MT7988’s UART is not 5V-tolerant), and it boots.
Straight into… OpenWrt 21.02-SNAPSHOT on kernel 5.4, built in 2023.
It works. It’s also ancient — kernel 5.4 on a 2026 router, random MAC on every boot, no maintained update path. It’s useful for exactly one thing: confirming the board is alive and giving you a working system to flash from. Then you replace it, per the reframe above — standard mainline OpenWrt is what belongs on the eMMC, not this 2023 museum piece.
Get the real thing: download, burn the SD image, boot it
Grab the current official SD-card image for the board from the OpenWrt Firmware Selector — the bananapi_bpi-r4-sdcard.img.gz (the plain one; ignore the -lite- and -poe- variants, those are different boards).
Burn it to a microSD with balenaEtcher — Etcher reads the .gz directly, no need to decompress. One caveat that will save you a confusing evening: low-level format / zero the SD card first if it has any prior data. The R4 is fussy about stale partition remnants and will throw filesystem errors at boot otherwise.
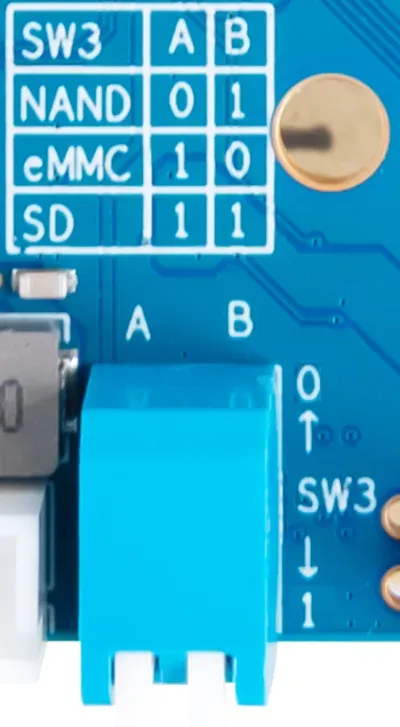 Jumper setting for boot - image from https://docs.banana-pi.org/en/BPI-R4/GettingStarted_BPI-R4
Then: SW3 to SD boot (all switches to “1”), serial console open, power on. And there it is — the slick OpenWrt ASCII art, this time OpenWrt 25.12, current kernel, apk package manager and all. Boot confirmed. The image is good.
 Out with the 2023 museum piece, in with the current build. - image generated via Nano Banana
The plot twist: you can’t flash eMMC from the SD boot
Here’s the wall I hit, and it’s a good one to understand rather than just route around.
Booted happily from SD, I went to write OpenWrt onto the eMMC — and the eMMC was nowhere to be found. No /dev/mmcblk for it, nothing. dmesg showed exactly one MMC controller coming up, bound to the SD card.
The reason is architectural: on the MT7988, SD and eMMC share the same SoC MMC controller. When you boot from SD, the device tree for that boot mode leaves the eMMC controller disabled — so the kernel never even sees the eMMC. You cannot dd to a device that doesn’t exist.
This is by design, and it’s why every “just dd the eMMC image” tutorial quietly assumes you’re booted from something that isn’t SD.
Lesson: the medium you boot from determines which storage is visible. SD-booted, the eMMC is invisible. Which points straight at the fix.
The clean fix: let the bootmenu do the flashing
The naive move here is to boot from NAND (where the eMMC is visible) and hand-dd the preloader, FIP, and rootfs to the right block devices and partitions. That works, but it’s four precise writes to exact partition targets, and one wrong of= is a brick.
There’s a far cleaner route hiding in plain sight: OpenWrt’s U-Boot recovery bootmenu can install to NAND and eMMC by itself. No TFTP server, no USB juggling, no manual partition math. It pulls the images from the recovery data already loaded and writes them to the right places with the right layout.
So the winning sequence became a two-hop relay:
Hop 1 — install current OpenWrt to NAND
From the SD-booted system, reboot into the U-Boot bootmenu and choose “Install bootloader, recovery and production to NAND.” It verified every image hash (crc32+ sha1+, all green), wrote the bl2 and the UBI volumes, and reported success. The factory museum piece on NAND was now replaced with current OpenWrt.
Hop 2 — from the fresh NAND system, install to eMMC
Flip SW3 to NAND, boot the newly-installed current OpenWrt, drop back into its bootmenu, and this time pick “Install bootloader, recovery and production to eMMC.” The log said exactly what you want to see:
## Checking hash(es) for FIT Image ...
   Hash(es) for Image 6 (rootfs-1): crc32+ sha1+
MMC erase: dev # 0, block # 131072, count 34480 ... OK
MMC write: dev # 0, block # 131072, count 34480 ... OK
Saving Environment to UBI... done
MMC ... dev # 0 — it was talking to the eMMC, erasing and writing, all confirmed OK. That’s the whole job the manual dd dance would have done, minus the brick risk, done by the board’s own tooling.
Why did this work when the SD boot couldn’t see the eMMC? Because now we’re booted from NAND, not SD — the eMMC controller is enabled, the chip enumerates, and the installer can reach it. Same lesson as before, used in our favour.
Boot from eMMC and confirm it’s real
Power off, SW3 to eMMC (its own switch positions from that silkscreen table), pull the SD card so there’s zero ambiguity, and power on.
Current OpenWrt 25.12 comes up — from internal storage, nothing external attached.
Don’t trust the banner alone; it looks identical no matter what you booted from. Prove it:
# ls /dev/mmcblk*
/dev/mmcblk0  /dev/mmcblk0boot0  /dev/mmcblk0boot1  /dev/mmcblk0rpmb  ...
The tell is mmcblk0boot0, boot1, and rpmb — those hardware boot partitions and the Replay Protected Memory Block are eMMC-only features. An SD card never has them. There’s your proof: the root is genuinely on the eMMC, the board is standalone, and the 119GB SD card is out of the picture entirely.
Mission accomplished: a current, official OpenWrt, running from the BPI-R4’s internal eMMC, installed without a single hand-typed dd-to-block-device and without ever risking the boot chain.
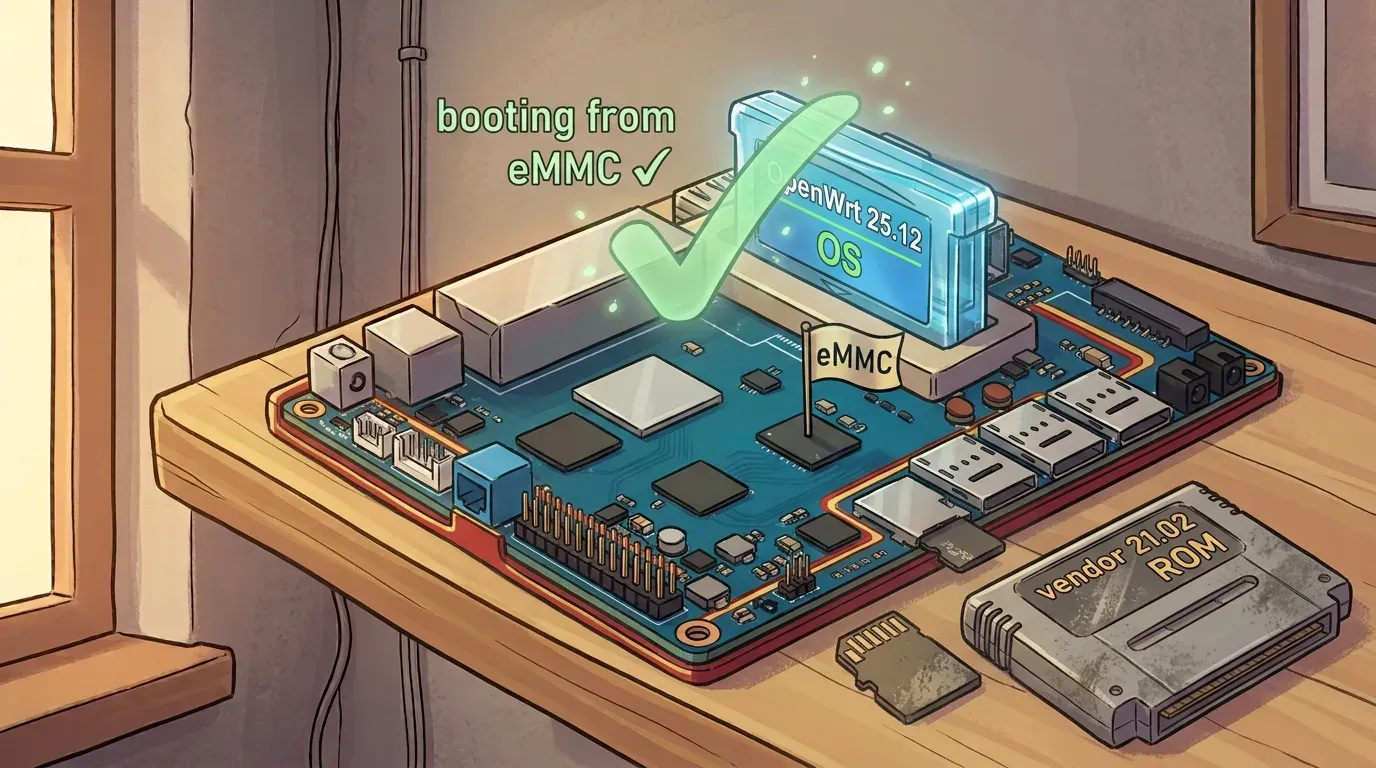 SD card ejected, running fully on internal eMMC - feet up. - image generated via Nano Banana
Quick housekeeping: give the box a name
Before you move on, one tiny thing that pays off the moment you have more than one device on the network: set a proper hostname, so you’re not staring at root@OpenWrt forever and wondering which box you’re SSH’d into.
There are actually two hostnames on a router, and it’s worth knowing the difference. The system hostname is what shows on your prompt and in LuCI:
# uci set system.@system[0].hostname='bpi-r4'
# uci commit system
# /etc/init.d/system reload
The DHCP client hostname is the name your router announces upstream on the WAN when it requests a lease — useful if your network admin registers devices by name:
# uci set network.wan.hostname='bpi-r4'
# uci commit network
# /etc/init.d/network restart
The uci commit is the part people forget — without it, uci set only stages the change and it vanishes on the next reboot. Verify it actually landed on disk:
# grep hostname /etc/config/system
# grep hostname /etc/config/network
If the name shows up in both files, reboot, and it’s still there — it’s permanent. One caveat worth internalising: “permanent” here means survives reboots, not survives a reflash. These settings live in the overlay, which a clean eMMC re-install wipes — so if you ever redo the install, you re-set the name.
Wi-Fi 7: the four-boss gauntlet nobody warns you about
Getting the BE14 Wi-Fi 7 card working was, honestly, harder than the entire eMMC install — and every wall was a silent one, where the thing looked fine and simply didn’t work. Four bosses, in order:
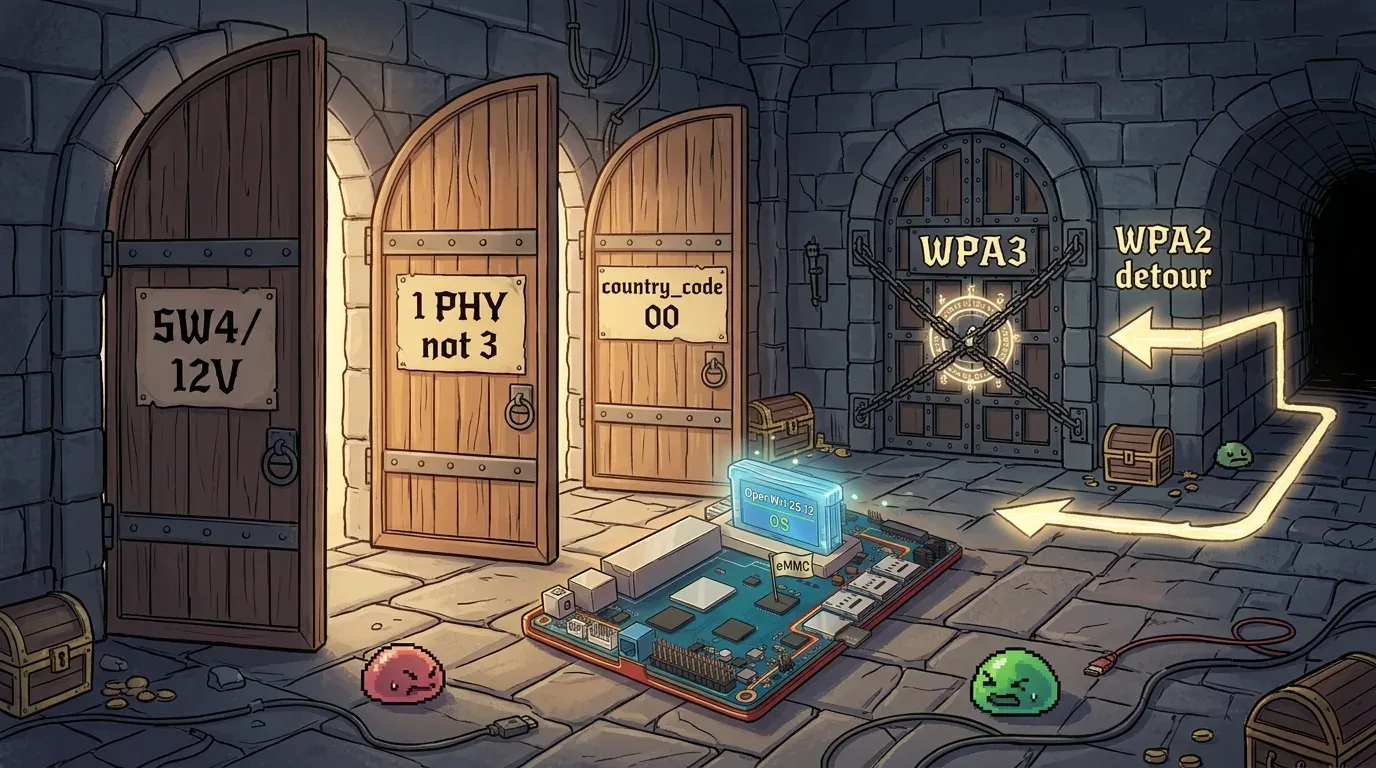 Four silent bosses between you and Wi-Fi 7 - and the last one you route around, not through. - image generated via Nano Banana
Boss 1 — the card is invisible (SW4 / 12V power)
Card seated, lspci shows nothing, /sys/bus/pci/devices/ is empty, and dmesg reports PCIe link down ... detect.quiet with error -110. That timeout signature means the controller is looking for a card and getting silence — the module has no power. The BE14 needs a 12V rail that’s gated by the SW4 switch, and it ships OFF. Flip SW4 to ON, and the card’s red LED lights and the PCIe link trains instantly. To find SW4 on your board, the official BPI-R4 Getting Started guide has the board layout — it’s the slide switch up near the SIM slots. This one switch is the difference between “dead card” and “working Wi-Fi,” and it is not obvious.
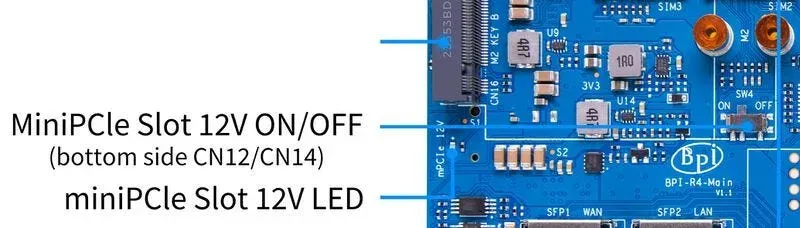 The SW4 switch - image from https://docs.banana-pi.org/en/BPI-R4/GettingStarted_BPI-R4
This one switch is the difference between “dead card” and “working Wi-Fi,” and it is not obvious.
Boss 2 - one PHY, three “radios”
Once powered, iw phy shows the card as a single PHY, but LuCI lists radio0/1/2. That’s the Wi-Fi 7 single-wiphy MLO model — one physical radio presenting 2.4 / 5 / 6 GHz bands. Don’t expect three fully independent radios; they’re bands on one PHY. Configure each band’s SSID/encryption, bind them all to your lan network, and clients land on the same LAN regardless of band.
Boss 3–6 GHz won’t appear (and the country code that blocks everything)
This is the big one, and it’s two problems wearing one coat. Symptom: enabled radios, correct-looking config, and nothing broadcasts. The log tells the truth:
hostapd: Line 7: Invalid country_code '00'
hostapd: Cannot enable IEEE 802.11d without setting the country_code
hostapd.add_iface failed for phy phy0.1 ifname=phy0.1-ap0
The regulatory domain was unset (00 = world), and hostapd refuses to start any AP at all in that state — all bands, not just 6 GHz. Set your real country on every radio:
# uci set wireless.radio0.country='SG'
# uci set wireless.radio1.country='SG'
# uci set wireless.radio2.country='SG'
# uci commit wireless
# wifi reload
Use your ISO country code, not mine — it’s a legal setting that dictates channels and power. This also explains why 6 GHz showed every channel as (disabled) earlier: under the world domain, 6 GHz (the most regulation-gated band) is killed entirely. Setting a country brings 2.4 and 5 GHz to life. As for 6 GHz specifically: on current mainline snapshots the BE14’s 6 GHz is still flaky (a documented NO-IR / regulatory-parsing issue), so the pragmatic call is run 2.4 + 5 GHz now and treat 6 GHz as a future win once the mt76 driver matures.
Boss 4 — WPA3 that won’t come up
With the country fixed, the APs still didn’t broadcast on WPA3-SAE. The usual advice — install wpad-openssl (the full-crypto daemon that supports SAE) in place of the default wpad-basic-mbedtls — is correct and necessary, and I did exactly that:
# apk del wpad-basic-mbedtls
# apk add wpad-openssl
And yet: WPA3-SAE still refused to start the APs on this build, even after the daemon swap. What actually got the networks on air was switching the encryption to WPA2-PSK (CCMP) — the instant I did, both Banana_cake (2.4 GHz) and Banana_cake_5G (5 GHz) lit up in LuCI with live signal readouts, and phones could see and join them. So the honest state of play on this snapshot: WPA3 on the BE14 is not reliably working yet regardless of the daemon fix, and WPA2-PSK is the encryption that works today. WPA2 is still perfectly secure for normal use — don’t let anyone guilt you off it while WPA3 support is half-baked on bleeding-edge hardware.
The takeaway across all four: with the BE14 on mainline OpenWrt, the hardware works, but every layer above it — power, PHY model, regulatory, crypto — has a silent trap. Read the hostapd log religiously; it names the fault when LuCI won’t.
Bonus: encrypted upstream DNS for the whole network
One more thing worth doing once the router’s up: encrypted upstream DNS, applied once on the router so every device on the LAN benefits automatically. Install the DoH proxy and its LuCI app:
# apk add https-dns-proxy luci-app-https-dns-proxyIt runs one instance per upstream (Cloudflare, Google, Quad9 — each on its own local port, bound to 127.0.0.1), and wires dnsmasq to forward to them. The one line that matters and is easy to miss: make sure dnsmasq has noresolv '1' set, or it’ll also query your ISP’s plaintext DNS from the WAN lease and quietly leak half your lookups. Verify with a leak test — the resolvers reported should be your chosen providers, never your ISP. Encrypted DNS hides the content of your lookups from the ISP and path; it doesn’t hide the sites you then connect to (SNI), and it moves trust to the resolver rather than eliminating it — but it’s a genuine, whole-network privacy upgrade for five minutes of work.
What’s next
The board is now a real router: current OpenWrt on internal eMMC, 2.4 / 5 GHz Wi-Fi 7 broadcasting on WPA2, and encrypted DNS for the whole LAN. Still on the bench: carving the unused eMMC space into a proper data partition (the default overlay is a cramped ~429MB) and getting Docker running on it for a couple of lightweight services — with the honest caveat that eMMC write-endurance makes it a “keep it light” host rather than a container workhorse. And 6 GHz remains parked until the BE14 driver grows up.
If you’ve ever self-hosted, you know the whole “run your digital life on hardware you own” philosophy fits a 10G open router perfectly — and if your self-hosting muscle memory is all Raspberry Pi + Docker so far, the BPI-R4 is the natural next box to bring under your own control. Same principle, more ports.