NVIDIA Mellanox Bluefield-2 SmartNIC Hands-On Tutorial: “Rig for Dive” — Part V: Install the Latest Bluefield OS with DPDK and DOCA
Table of Contents
In this episode, we will install the latest Bluefield OS on the Bluefield-2 DPU from scratch. As a result, we will be given a fresh system with DPDK and DOCA pre-installed.
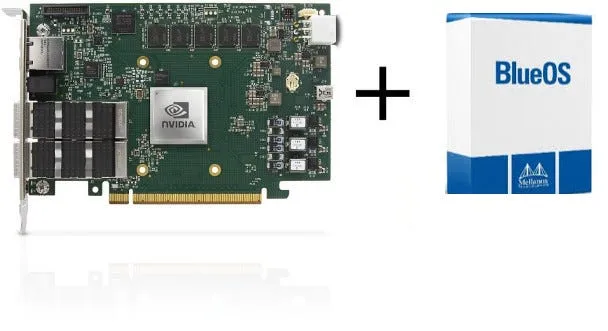 We will install BlueOS from scratch on the Bluefield-2 SmartNIC
Preamble
In the last episode, Part IV., I had some trouble accessing the Bluefield after firing up my ultimate Cloudlab setup in Part III. As a result of getting permission denied every time I tried to log in to the Bluefield, I decided to reinstall the whole operating system on it…I had the feeling that maybe someone has changed the password for fun. The part below presents how this can be done.
The information gathered here is from the following NVIDIA documentation and guides:
- Upgrade NVIDIA Bluefield DPU Software
- Installation and Initialization
- Installing Popular Linux Distributions on BlueField
The Reason to Reinstall
First of all, let’s see why I decided to reinstall the OS from scratch. Of course, the expected benefits are always there: new system, more things built-in, most up-to-date, etc.
However, I installed it because I could not access the Bluefields neither through the rshim and SSH nor through rshim console.
 Default credential is not working — “great”!
Okay, I was first checking whether the IP address I wanted to login into is okay. Apparently, it is. No other interface has any IP within the same range (i.e., with the same netmask), and also *route -n *tells me that I could not try to connect to a random machine on the network. I can only connect to the one reached through the rshim interface.
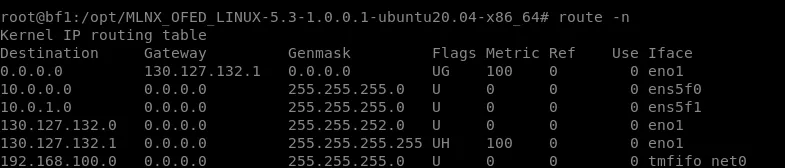 Connection requests sent to 192.168.100.0/24 can only be consumed by the Bluefield.
I could only come to the conclusion that when your experiment or node reservation expires, Cloudlab does not reset Bluefield; it only resets the Host OS. And maybe a funny guy was experimenting with changing the password :)
Anyway, there is no such way to reset the settings on Bluefield, or at least I did not find such documentation. However, we can reinstall an OS from scratch. This might sound a bit tricky, and it reminisces me to the good old days when I was flashing cheap TP-link routers with OpenWRT images, hoping to not brick them :D
How to Install an OS on the Bluefield?
According to the Installing Popular Linux Distributions on Bluefield manual from NVIDIA, we simply do this. I scrolled down to the end of this documentation, where the Ubuntu With MLNX_OFED Installation guide is shown.
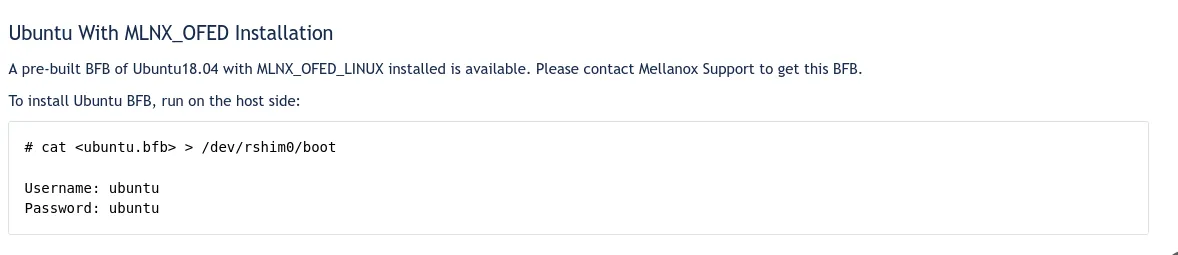 Ubuntu installation guide with MLNX_OFED drivers
Pretty straightforward, isn’t it? The only problem is: how do I get that bfb image. The whole guide just says it’s kinda shipped with your Bluefield NIC…I think this is the first problem of not having the NIC itself but only playing around with it at Cloudlab :)
Okay, after asking questions on the NVIDIA developer forum about DOCA SDK, I got an answer that the Bluefield Software I can download from here (scroll down to the very end) already contains DOCA. After clicking through the terms and conditions, I eventually downloaded a bfb image file…Yaaay. Since this also includes DOCA, it will be good in the future (maybe in Part VI. :)).
Download cmd with the exact URL
# wget https://content.mellanox.com/BlueField/BFBs/Ubuntu20.04/DOCA_v1.0_BlueField_OS_Ubuntu_20.04-5.3-1.0.0.0-3.6.0.11699-1-aarch64.bfbWait a sec!! What if the default credential (i.e., ubuntu/ubuntu) will not work? How can I be sure about this?
Luckily, I found another documentation, which addresses this issue. The most important part is to create a hash of the password you want to use, save it in a text file, and set it as a configuration parameter when installing the bfb image to the Bluefield.
Create password
# openssl passwd -1
Password:
Verifying - Password:
$1$3B0RIrfX$TlHry93NFUJzg3Nya00rE1
Save it as a configuration file
# nano bf.cfg
ubuntu_PASSWORD='$1$3B0RIrfX$TlHry93NFUJzg3Nya00rE1'
Install pv to be able to keep track of the installation process
# apt-get install pvInstall the image
# bfb-install --rshim /dev/rshim0 --bfb DOCA_v1.0_BlueField_OS_Ubuntu_20.04-5.3-1.0.0.0-3.6.0.11699-1-aarch64.bfb --config bf.cfgIt will take 5–10 minutes, so feel free to grab your breakfast or a coffee. Or just simply stand up and walk around to boost your blood circulation :P
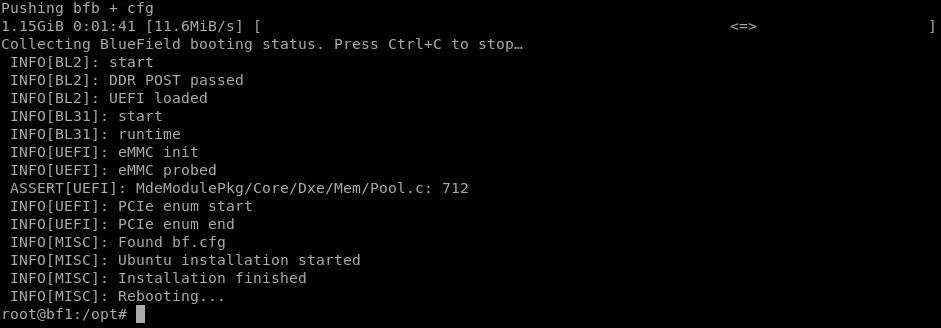 Installing Ubuntu 20.04 on the Bluefield with the password explicity set to ‘ubuntu’
Reboot also takes some time. While it seems the Bluefield is already up, as you can ping the IP 192.168.100.2, the SSH daemon will be running a bit later. For me, it’s around 3–4 minutes. So, don’t give up early; just wait…
Okay, it seems we are done. Let’s try…fingers crossed.
This solution was not working either as I still got the permission denied error.
As a last resort, I tried to not set the “* — config*” parameter; this leads us to a case when after typing in the default credentials at the first login, we will be immediately prompted to change the password.
After reinstalling the image in that way, I still cannot access the Bluefield :(
The Final Solution
I started to scratch my head even harder and tried further troubleshooting that is not directly related to the Bluefield itself.
I started by explicitly removing all IP addresses assigned to the Bluefield ports. Then, also switched off the interfaces via ifconfig down
Finally, I observed that I have multiple ifb interfaces present. Intermediate Functional Block (i.e., ifb) is a pseudo-interface that acts as a QoS concentrator for multiple different traffic sources. Packets can be redirected or even dropped to fulfill specific needs. Click here for more details. So, I thought, I won’t need these interfaces, especially if they can take over the control of my network. Let’s remove them.
The easiest way to get rid of all of them is to remove the kernel module itself.
# rmmod ifbAfter removing the kernel module, no ifb interfaces exist anymore.
And, what is more, I could finally reach Bluefield via rshim and SSH.

And I was also prompted to change the password as promised after my last installation efforts. I have changed it to ‘bluefield’ as it does allow me to have ‘ubuntu’.
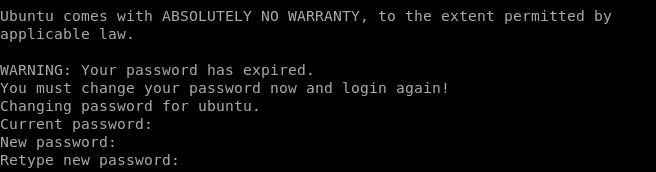 Prompt to change password after the first login
After logging in, I changed it back to ‘ubuntu’. Note, as ‘ubuntu’ user, the system will not allow you to use ‘ubuntu’ as a password since it is too weak. Hence, you have to be root and then explicitly assign the password ‘ubuntu’ to user ‘ubuntu’.
# sudo su
# passwd ubuntu
New password:
Retype new password:
passwd: password updated successfully
We can obtain the version number of the Bluefield Ubuntu OS we have just installed once logged in.
# uname -a
Linux localhost.localdomain 5.4.0-1008-bluefield #11-Ubuntu SMP PREEMPT Fri Mar 5 13:59:26 UTC 2021 aarch64 aarch64 aarch64 GNU/Linux
# lsb_release -a
No LSB modules are available.
Distributor ID: Ubuntu
Description: Ubuntu 20.04.2 LTS
Release: 20.04
Codename: focal
Check all the drivers installed under /opt/mellanox
# ls /opt/mellanox |cut -d ' ' -f 9
doca
dpdk
ethtool
hlk
iproute2
mlnx-fw-updater
mlnx_snap
mlnx_virtnet
opof
scripts
spdk
OvS bridge
Even OvS is installed and run by default. Actually, two OvS bridges are running, ovsbr1 and ovsbr2, configured similarly to the right-hand side of the figure below.
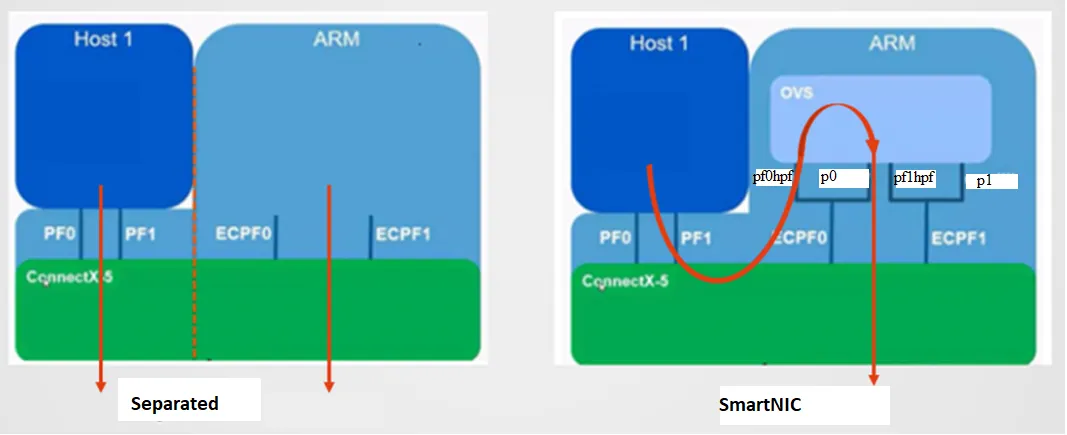 We have OvS running by default. Although, we have two OvS bridge instances (shown as one on the right hand side)
# ovs-vsctl show
0e86e052-9898-4e78-aee2-deba386b327e
    Bridge ovsbr2
        Port pf1hpf
            Interface pf1hpf
        Port p1
            Interface p1
        Port pf1sf0
            Interface pf1sf0
        Port ovsbr2
            Interface ovsbr2
                type: internal
    Bridge ovsbr1
        Port pf0hpf
            Interface pf0hpf
        Port p0
            Interface p0
        Port pf0sf0
            Interface pf0sf0
        Port ovsbr1
            Interface ovsbr1
                type: internal
    ovs_version: "2.14.1"
For now, let assume all will work properly, and we might not need to repeat the installation steps presented in Part II
Conclusion
Whenever you cannot access the Bluefield, first try to clean up your networking interfaces by removing all IP addresses and routing table entries that can affect “the path towards the Bluefield”.
If you are at Cloudlab, try ‘bluefield’ as a password, too. Just in case, Cloudlab indeed does not reset the SmartNICs. However, after my installation efforts, I have changed back the password to ‘ubuntu’.
Before reinstalling the OS on the Bluefield as a last resort, check whether you also have some ifb devices; and remove them.
Since this post, my experiments have been scheduled several times to different servers at the Clemson cluster. At least 4–5 Bluefields are already running the latest DOCA-enabled firmware :)
Still cannot access?
Leave a comment and/or contact me, I might can help :)
In the next part, Part VI., I will investigate the performance of the DPDK-based OvS on the Bluefield.