
NVIDIA Mellanox Bluefield-2 SmartNIC Hands-On Tutorial: “Rig for Dive” — Part III: Ultimate Cloudlab Setup
Table of Contents
In this tutorial, we go through all necessary steps to configure and fire up an experiment with two Bluefield-2 SmartNICs connected back to back atthe Cloudlab facility at the University of Clemson.
Ultimate Cloudlab Setup for NVIDIA / Mellanox Bluefield-2 Experiments
 Bluefield-2 Lan Setup at Cloudlab.
Disclaimer
While this part is a sequel of my series with the same title as “NVIDIA Mellanox Bluefield-2 SmartNIC + DPDK: “Rig for Dive” (c.f. Part I and Part II), here I only talk about the Cloudlab setup. Hence, if you lucky and have your own servers with your own Bluefields, you can skip this part and continue with Part IV.
TL;DR

Jump to the end of the document to grasp the lessons learned.
Defining the Cloudlab Profile
Okay, this is the part that did not let me sleep for a while.
First, defining the profile seems relatively easy as you just use a Drag & Drop editor, fill out some text fields, and do it. Accordingly, I have created a profile and used this topology editor to click together my profile.
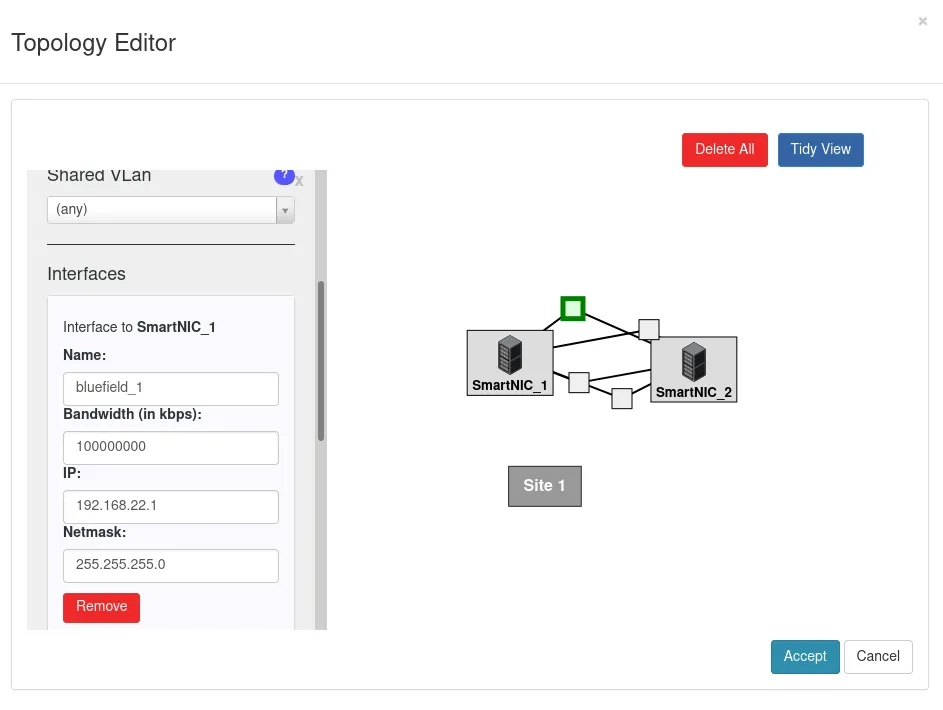 Drag & Drop your topology, and fill in the details. Easy, isn’t it?
So, I had the following plan. According to Part I, where I could only use a single machine, I saw that besides the Bluefield-2, there is a smartNIC (with non-capitalized ‘s’) with two ports (remember the ConnectX-5 NIC), also installed in the same machine. Thus, to force the system to surely provide a connection between the two machines through the Bluefields, I came up with the topology shown above. I connect then the two machines with 4 links, then after the system connects the smartNICs, it will also connect the Bluefields.
For easier identification, I also named the interfaces for the nodes. I wanted to have ‘bluefield1’ for port 0 and ‘bluefield2’ for port 1 on both machines. After assigning IPs with proper netmasks, I saved the profile and scheduled for an experiment.
Take it easy, Dude! — Resolve Errors First
Yes, I had to schedule for the consecutive day as the cluster is still very overwhelmed when writing this article (04/2021). So, the day after, I woke up and was eager to play around with my topology. However, an error was waiting for me. It said that my profile has serious errors. For instance, having the same name for multiple interfaces thus, it could not be deployed.
So, I was waiting for nothing, as my scheduled experiment failed and my “reserved slot” was assigned to some astute users waiting for this :) After trying to repair my topology details, I encountered the same failure the next day but a different error. Actually, the bandwidth I set (100,000,000 kbps = 100 Gbps) was too high and could not be fulfilled. The cards only support 40Gbps interfaces. “Strange,” I said, since the code name of the Bluefield 2 (revealed in Part I) supposed to mean 2x100G interfaces even though the output of the lspci/lshw. It’s my bad; I should have listened to the lshw instead of my instincts.
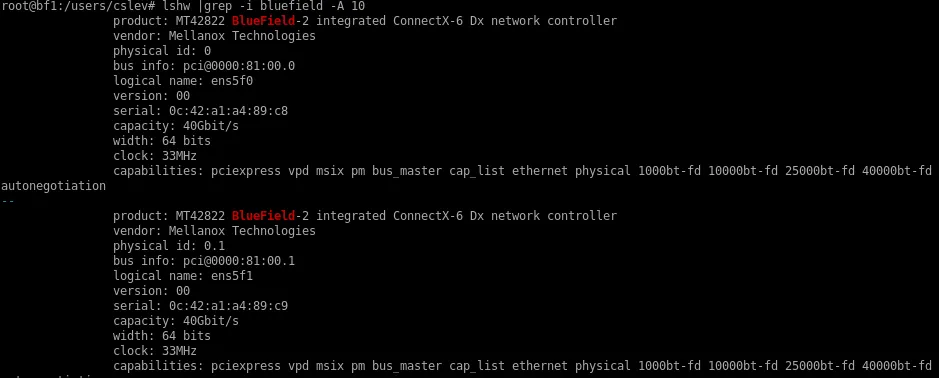 Always listen to lshw instead of your instincts. Check ‘capacity’ that is shown as 40Gbps only
Okay, after repairing this, I did not want to let the same experiment be simply scheduled as before. Otherwise, what if there is another error, typo, or whatnot?
Geni-lib Script Conversion Saved My Life
Then, I observed a great feature. You can actually convert your topology to a so-called Geni-lib script. When the script is ready, you can test it, which involves checking it syntactically and semantically…Yaaay, the feature I was craving for two days.
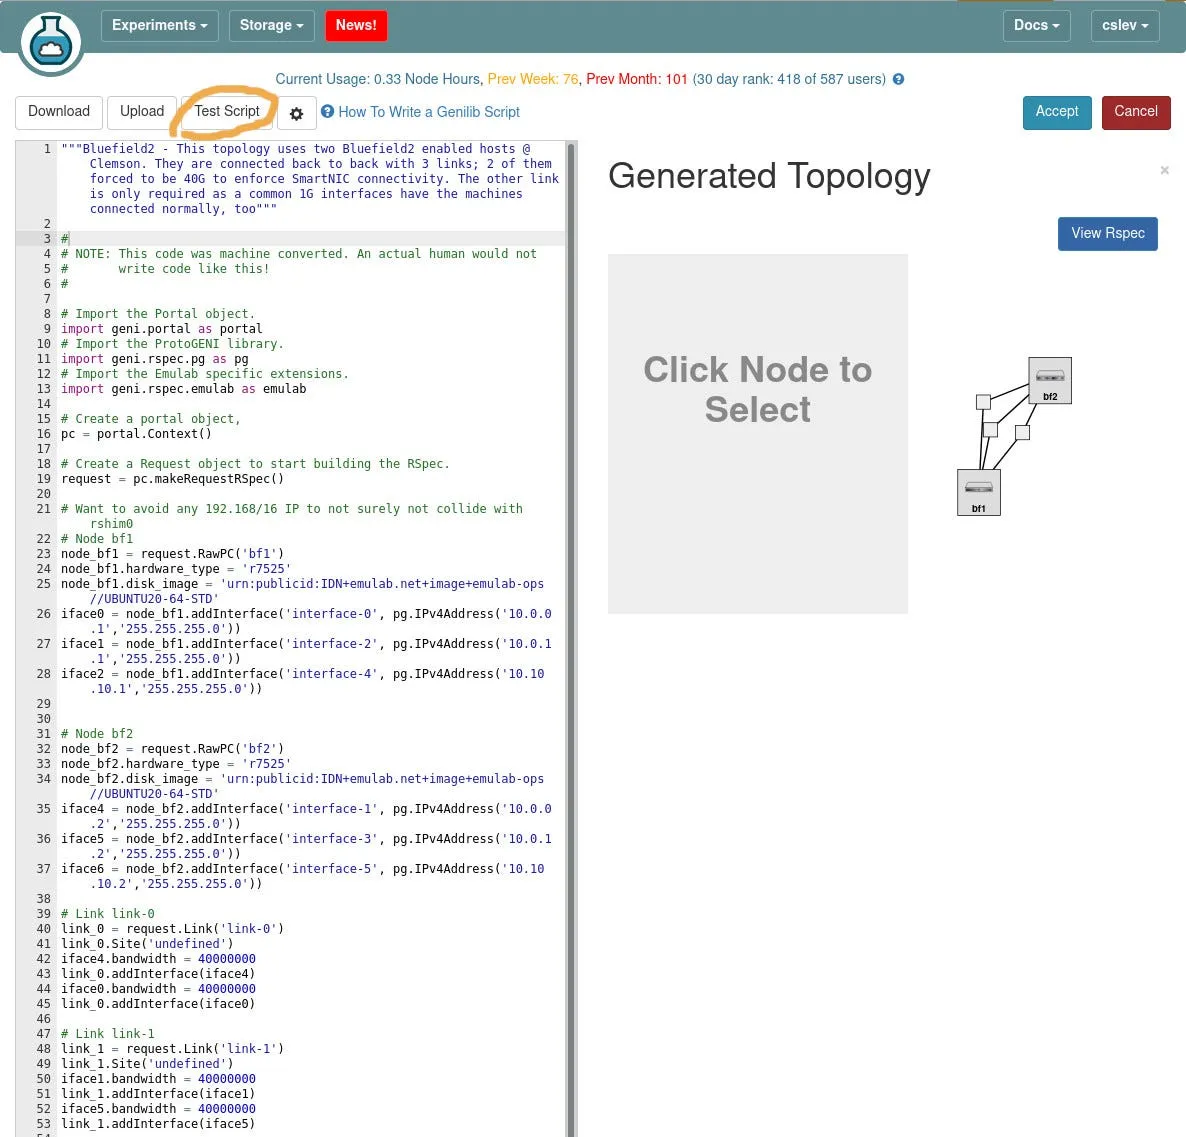 Testing your geni-lib script. If no error happens, hit Accept and you script is ready to be deployed.
Scheduling the Ultimate Cloudlab Profile
After all, everything was given to finally deploy my topology. I scheduled my experiment to run, again, only for the consecutive day. This time, I was sure when I wake up, all my dreams can come true.
You won’t believe it, but it was still not working. Even though I scheduled it to a time slot that was shown to be available on the resource availability graph, I got an error saying there is no sufficient number of nodes for my experiment. Someone should have scheduled his/her own experiment just seconds before me, and the schedule itself turned out to be not checked by Cloudlab.
Accordingly, instead of scheduling an experiment, you should expressly reserve nodes, then you can run whatever experiment you want instantly (until your experiment can be fulfilled by the number of nodes you booked).
The reservation is pretty straightforward, and it also shows you the availability of the nodes.
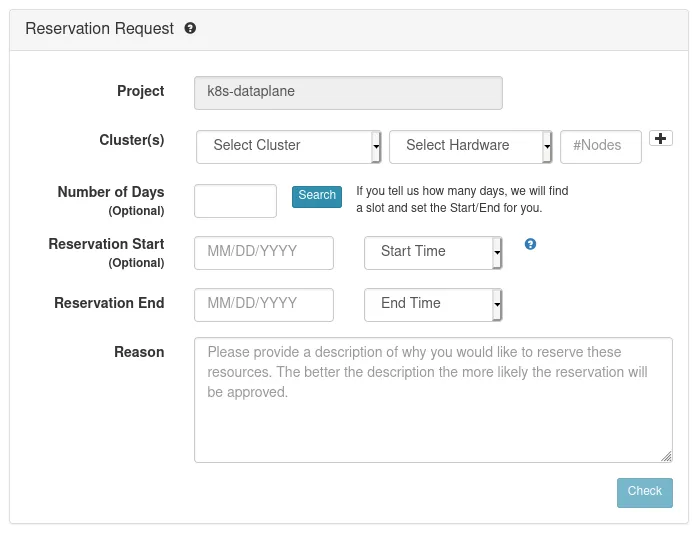 Node reservation dashboard of Cloudlab
Once you click on ‘Check’, it indeed checks whether there are sufficient resources for your desired time slot.
Deploy finally the Ultimate Profile
Once my reserved time slot has come, I instantiated my experiment. You won’t believe it, but I again encountered an error. At least, the nodes are reserved for me to freely adjust my experiment profile and re-instantiate it.
UPDATE: Pay attention to your experiment’s and your reservation’s expiration time. The former cannot be later, otherwise you might end up a “not enough resource” error. Put differently, whenever you re-deploy your experiment for any reason, it will be allocated for 16 hours by default. However, if you don’t have 16 hours left for your reservation, then the problem arises.
This time, it turned out my topology was too “dense” to be deployed, and Cloudlab could not fulfill all my connections defined.
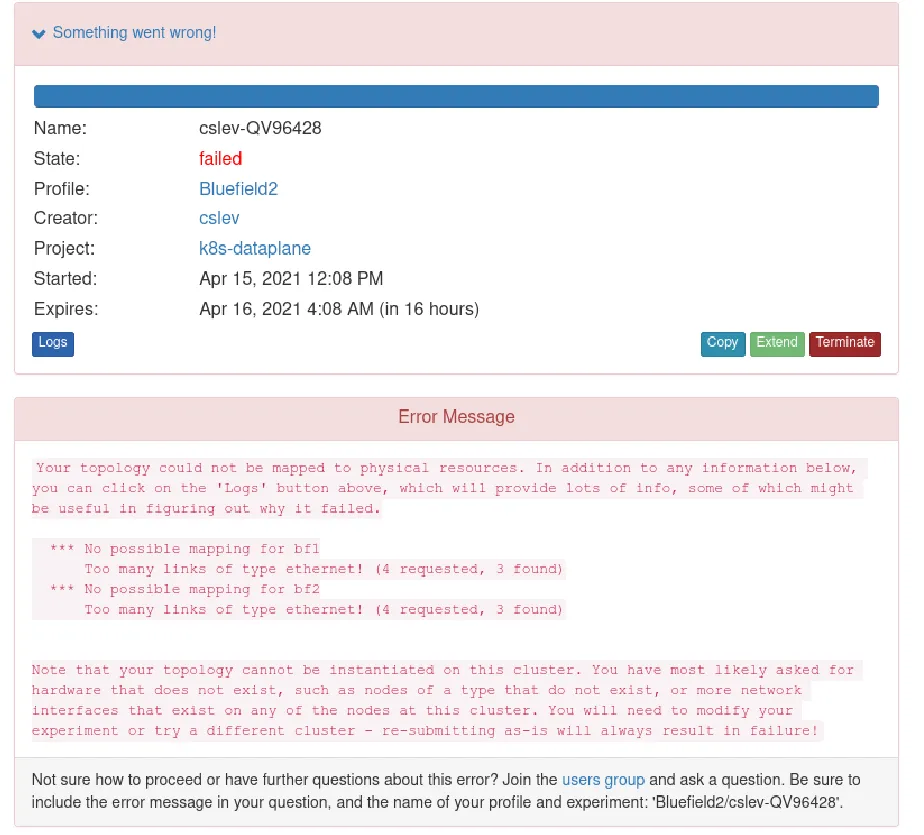 The last error: Too many connections were requested.
I modified my experiment profile and removed one of the 1G connections. Voilá, my experiment has been finally deployed without error. However, this was my first experience where the deployment took so much time. The hosts should have been already up, but my topology required the control plane to spend some time materializing my request. Eventually, after a few minutes, my experiment is up and running.
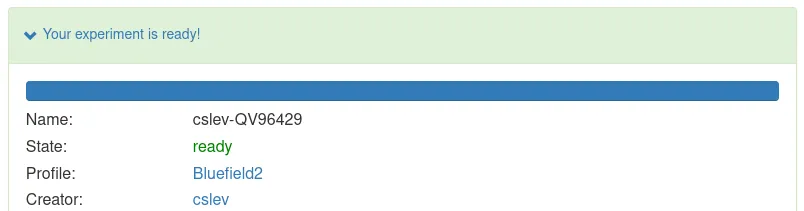 My Experiment with two Bluefield-2 SmartNICs connected back to back is finally ready!
The Working Topology Script
Below, you can find the final profile configuration script generated by the geni-lib. It is also much easier to configure your profile through the geni-lib script as the topology viewer/editor itself is sometimes soooo slooow.
Observe that in the below script I have removed the IP assignments. It’s better to not have any IP set for the interfaces by default and let them be in DISABLED state. Later, we can bring them up, don’t worry ;)
"""Bluefield2 - This topology uses two Bluefield2 enabled hosts @ Clemson. They are connected back to back with 3 links; 2 of them forced to be 40G to enforce SmartNIC connectivity. The other link is only required as a common 1G interfaces have the machines connected normally, too"""
#
# NOTE: This code was machine converted. An actual human would not
#       write code like this!
#
# Import the Portal object.
import geni.portal as portal
# Import the ProtoGENI library.
import geni.rspec.pg as pg
# Import the Emulab specific extensions.
import geni.rspec.emulab as emulab
# Create a portal object,
pc = portal.Context()
# Create a Request object to start building the RSpec.
request = pc.makeRequestRSpec()
# Node bf1
node_bf1 = request.RawPC('bf1')
node_bf1.hardware_type = 'r7525'
node_bf1.disk_image = 'urn:publicid:IDN+emulab.net+image+emulab-ops//UBUNTU20-64-STD'
iface0 = node_bf1.addInterface('interface-0')
iface1 = node_bf1.addInterface('interface-2')
iface2 = node_bf1.addInterface('interface-4')
# Node bf2
node_bf2 = request.RawPC('bf2')
node_bf2.hardware_type = 'r7525'
node_bf2.disk_image = 'urn:publicid:IDN+emulab.net+image+emulab-ops//UBUNTU20-64-STD'
iface4 = node_bf2.addInterface('interface-1')
iface5 = node_bf2.addInterface('interface-3')
iface6 = node_bf2.addInterface('interface-5')
# Link link-0
link_0 = request.Link('link-0')
link_0.Site('undefined')
iface4.bandwidth = 40000000
link_0.addInterface(iface4)
iface0.bandwidth = 40000000
link_0.addInterface(iface0)
# Link link-1
link_1 = request.Link('link-1')
link_1.Site('undefined')
iface1.bandwidth = 40000000
link_1.addInterface(iface1)
iface5.bandwidth = 40000000
link_1.addInterface(iface5)
# Link link-2
link_2 = request.Link('link-2')
link_2.Site('undefined')
iface2.bandwidth = 1000000
link_2.addInterface(iface2)
iface6.bandwidth = 1000000
link_2.addInterface(iface6)
# Print the generated rspec
pc.printRequestRSpec(request)
Verifying Topology
I accessed the machines, checked the interfaces, and confirm the settings via all the essential tools, i.e., with lshw, ifconfig, and* ping*.
Let’s see the details on the first node only (for brevity). The same is observed on the other one.
Check Hardware with lshw
We can see that Bluefield is indeed installed in the machine, and it has two 40Gbps ports identified by ens5f0 and ens5f1.
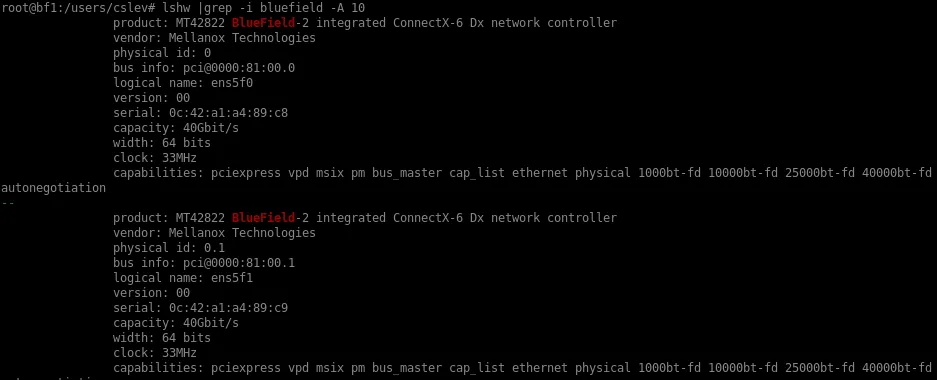 lshw shows that we have a Bluefield installed, and it has two 40Gbps ports identified by ens5f0 and ens5f1.
Check IP Configurations with ifconfig
When I issue ifconfig, I can see that both of Bluefield’s ports have the requested IP addresses.
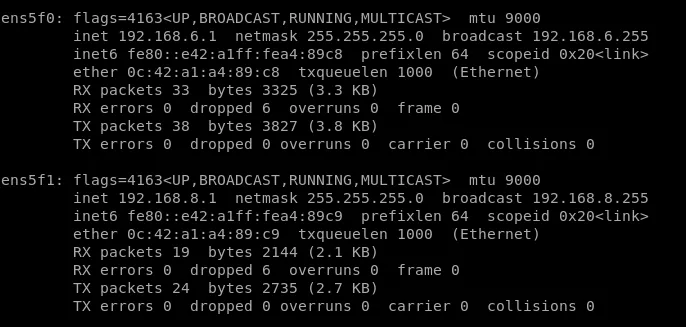 ifconfig shows that both ports of the Bluefield is configured as requested.
Check Connectivity with ping
Let’s then ping the other end of my topology on both interfaces.
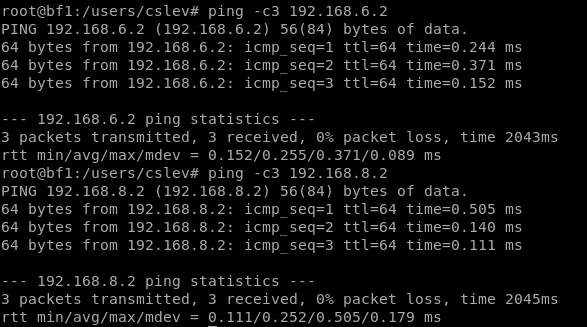 Pinging the other end of the topology using both ports
We can conclude that our profile works as we wanted when deployed at Cloudlab.
This lead us to the end of Part III. Join me on Part IV. to see what is the performance of Bluefield in different settings and to get to know why does the system show 40G interfaces, though Bluefield supports 100G (and their ports’ form factor even more).
Summary
- Always reserve nodes on Cloudlab instead of simply scheduling an experiment!
- Use Geni-lib script conversion tool and test the script to avoid any syntactic /semantic error!
- Use the script provided above to achieve the same experiment!
- Bluefield-2 SmartNICs are only connected in a 40GbE network, you cannot ask for more than that, i.e., for 100G and above.
- You can only have three links defied between two nodes at the Clemson cluster that have Bluefields installed (nodes of type r7525).